Monday, February 26, 2024

Harvey MG-36 Pro Miter Gauge: Worth the Upgrade?

Two years ago, I did a massive comparative review of ten different miter gauges. One of the most anticipated in the review was the Harvey MG-36. In spite of the high price and promise of quality, I found the gauge came up short in numerous areas and I had to give it a “do not buy” recommendation. Recently, Harvey released the MG-36 Pro and many of you asked me to provide an update. So here’s my Harvey MG-36 Pro review.

Normally I like to spend a few months with a product before doing a review, but this miter gauge is very similar to the non-pro version and I was able to spot the improvements and problems within minutes of opening the box. I then spent a few weeks actually using the gauge just to see how things played out.

Appearance

The fit and finish of the MG-36 Pro is just as beautiful as the original.

Price

I paid $399 in August of ’23 with a final price of $447.51 with shipping and tax. I’ve since monitored the price at Harveywoodworking.com and like seemingly all of their products, the price fluctuates by the day. The lowest price I’ve seen so far was $299. If the price is any higher than that, I’d recommend checking back daily and holding out for the lowest price possible.

The Miter Bar

The miter bar was extended 1″ which allows for cutting wider workpieces. The bar also now features an additional concentric washer at the user end, solving a wobble issue that existed in the original MG-36. Harvey also changed the concentric washers to a design that I find easier to adjust and more reliable.

The Protractor Head

Harvey upgraded the protractor head from the gappy 1 degree resolution of the MG-36 to a new gap-free vernier scale system boasting 0.1 degree resolution. They also improved the sloppy detent issue I observed previously. While somewhat snappier, the spring pin still feels too soft for my tastes. It’s still far too easy to pop in and out of the detents. Much like the original MG-36, there’s really no need for the pin retraction button. I personally feel the design of this system is flawed. Fortunately, if you give the fence a little wiggle you’ll find that it tends to settle into the center of the detent. I also found that tightening the knob usually sends the pin home. I say “usually” because as you’ll see in the video, you can still easily lock it down and find that you’re off the mark. Thanks to the new vernier scale, you can see exactly how much error is present and correct it if necessary.

The Fence

The fence is nearly identical (if not actually identical) to the original MG-36. I had an issue with mine where the red extension piece tilted back when tightened down. A replacement from Harvey corrected this issue. The fence extension is listed as 36″ long but I was able to measure about 40″, which is a nice bonus. Unfortunately, Harvey still refuses to correct the false claims on their website that their fence is the longest on the market. Tsk Tsk!

The Stop

While the previous stop had a couple of issues, none of those were deal-breakers. And thankfully, the problems I discovered in the previous version were actually improved. Unfortunately this was one step forward and two steps back, since the stop is now unusable for workpieces that aren’t at least 5/8″ thick. This is because there’s a 5/8″ gap between the stop and the fence. Of course, you can get around this problem by using a sacrificial fence (something you should be using anyway). But if you like to go commando with no sacrificial fence, the stop is going to prove problematic at some point.

The other bigger issue I found with the stop is that Harvey shortened the spine that rides in the fence slot by about 50%, resulting in 0.012″ of potential movement. So while the stop boasts 0.001″ micro-adjustability, a light tap of the stop can knock it out as much as 0.012″. I was able to test two of these stops and they both exhibited this issue. The movement was also confirmed by two other MG-36 Pro owners and Harvey themselves.

Customer Service

The customer service I received was much improved over my previous experience. In fact, it was stellar. They were friendly, responsive and eager to fix my issues. Unfortunately, the sloppy stop is a design failure that can’t be fixed with a Bandaid solution and a refund was offered if I felt the product didn’t meet my expectations.

Conclusion

I’m happy to say that the Harvey MG-36 Pro is a serviceable miter gauge. It’s not perfect and depending on the kind of work you do the sloppy stop issue might be a deal-breaker. The sloppiness in the detents is still a big disappointment. However, with the caveats discussed in the video you can achieve decent results. Overall, Harvey addressed pretty much every issue I found in my previous review. They either improved them greatly or fixed them. That said, if you’re in the market for a miter gauge I think the Jessem Mite-R-Excel II is still your best bet for the money. Even if you’re able to get the MG-36 Pro at $299 (the lowest price I’ve seen), the Jessem can be had for only $25 more. And the Jessem doesn’t suffer from any of the issues found in the MG-36 lineup.

The post Harvey MG-36 Pro Miter Gauge: Worth the Upgrade? appeared first on The Wood Whisperer.


from The Wood Whisperer https://ift.tt/ib6twfC
via IFTTT

Wednesday, February 21, 2024

A New Product for Rust Removal!

Save 10% on your purchase at Carbon Method using the code SpagCoat

Please note that this video is a paid advertisement and I will receive a small commission if you purchase something from Carbon Method using my code or link. I truly appreciate your support.

You may already know Carbon Method for their rust preventative I showed off in this video and the subsequent testing I did in this video. They have since released a new product for rust removal, the Carbon Coating Prep Kit that contains three abrasive pads and their Reconditioning Oil. Using their kit you can remove rust faster, easier, and more effectively that with traditional abrasive or chemical techniques. When you’re done, the surface is prepped and ready for the rust preventing Carbon Coat. Get your kit here and say bye bye to rust! 

The post A New Product for Rust Removal! appeared first on The Wood Whisperer.


from The Wood Whisperer https://ift.tt/tzrOHGN
via IFTTT

Monday, February 19, 2024

Own it or Make it!

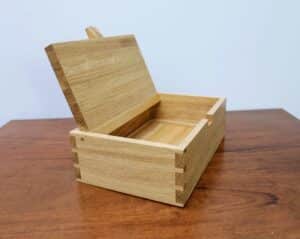
This box is my latest offering in box design. I was very pleased with the outcome and decided we should video its making for others to make. I cannot recall the timing of things but in the way of how all things often come together, my family wanted to contribute something in support of my...

Source


from Paul Sellers' Blog https://ift.tt/YiVzysn
via IFTTT

Sunday, February 18, 2024

Choosing a Wood

How often we see figured grain and say how pretty that looks, imagine exposing such beauty and such wood to enhance a piece like the neck of a spoon, a ladle’s bowl. Why choose so for the back of a cello and a violin, its neck and scroll and more in the bouts with tight...

Source


from Paul Sellers' Blog https://ift.tt/xXCrPLn
via IFTTT

Tuesday, February 13, 2024

Is Woodworking Self-care :-)?

Well, of course, it is! It seems that all things extra in life now carry the added titles of well-being, mental health care, and quality of life together with two dozen others. Often this state of well-being breaks down into something encapsulated as physical wellbeing it’s really a relatively new term identifying what has always...

Source


from Paul Sellers' Blog https://ift.tt/aEFKPxl
via IFTTT

Monday, February 12, 2024

Top Construction & Oil Finish | The Big Finish | Sideboard Pt 11

As the Sideboard Series comes to a close, we’ll embark on the Top Construction & Oil Finish. The top is really just a large walnut panel. I like to use Dominos to help keep the panels aligned curing the glueup though the same thing could be achieved by using several sets of cauls. The idea is to keep the boards as even as possible so that it limits the amount of work we need to do after the glue dries. After the top is fully scraped and sanded, I added a small 1/8″ roundover. If you’re looking for more information and tips for making wide panels that stay flat, check out this video. 

The finish I used is Bumblechutes, a natural tung oil finish thinned with citrus solvent. You can save 10% using the code TWW10 at Bumblechutes.com This finish is not the most protective in the world, but it does just fine on a piece of furniture that doesn’t require a ton of protection.

The top is attached to the case using screws and elongated screws. 1 1/4″ should do the trick as long as you don’t drive them too deep. The back panel is then added with glue and brad nails.

If you enjoyed this series, please let us know in the comments. This kind of content just doesn’t do well on YouTube these days but for a business like ours, the view numbers only tell part of the story. So give us some feedback and in the meantime, check out The Wood Whisperer Guild for more high quality detailed courses from some of the best instructors in the industry.

Looking for the Summary version of this build? Click here!

Stuff I Used:

Download the FREE Plans:

The post Top Construction & Oil Finish | The Big Finish | Sideboard Pt 11 appeared first on The Wood Whisperer.


from The Wood Whisperer https://ift.tt/skb5hq1
via IFTTT

Tuesday, February 6, 2024

This Wooden Plane . . .

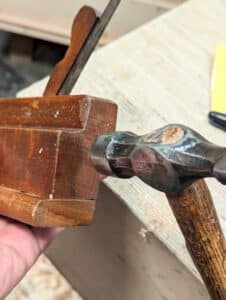
. . . .cuts grooves fast and accurately. But it does a lot more if you want it to. I think we might have undervalued the wooden plane but even more so the men that used them for centuries before we abandoned them almost altogether. It’s the lightness of them that we really lost but...

Source


from Paul Sellers' Blog https://ift.tt/15sSYih
via IFTTT

Friday, February 2, 2024

Sawtooth Standards | Door Coves & Adjustable Shelves | Sideboard Pt 10

Before starting on the sawtooth standards, we’ll need to add a detail to the sliding doors that I nearly forgot about: finger holds. To make sure the door has something to grip, we’ll simply add a cove to the edge. I only added one cove to my doors but might consider adding another later. After all, the doors need to slide in both directions.

For the adjustable shelves, there are several ways we can have them interact with the case. Typically we use a series of holes and shelf pins but on a piece like this, I felt we should go the extra mile by building sawtooth standards. If you’re not familiar, this system includes standards that are notched so they can receive shelf supports that run from front to back. It’s a very cool but labor intensive choice that has the added bonus of requiring no metal or plastic. A classy way to construct adjustable shelves!

Looking for the Summary version of this build? Click here!

Don’t miss the pre-order price for Philip Morley’s Tambour Record Console course. Price goes up February 9th!

Stuff I Used:

Download the FREE Plans:

The post Sawtooth Standards | Door Coves & Adjustable Shelves | Sideboard Pt 10 appeared first on The Wood Whisperer.


from The Wood Whisperer https://ift.tt/pNt1POc
via IFTTT

Thursday, February 1, 2024

Would the Router . . .

. . . by any other name be as sweet? Mention router to anyone and the mind immediately conjures up thoughts of a screaming, two-handed hand-held machine in Bosch turquoise, Dewalt yellow or Festool bright green and black. Additionally, that is with you the machinist wearing protective headgear like a gladiator ready to do battle....

Source


from Paul Sellers' Blog https://ift.tt/F5hxJyP
via IFTTT