Special thanks to Woodcraft for their support of our show!
Over the years, I’ve had a lot of different shops including several garage shops and now a large Firehouse shop. Each move brought a fresh set of challenges. And almost every time, the solution wasn’t buying something, it was building something.
That’s really what shop projects are all about. They’re not just filler builds. They’re problem-solvers. Workflow improvers. Sanity savers. And honestly, when I’m burned out, this is the stuff I gravitate toward. There’s something incredibly satisfying about dialing in your space and making it work better for you.
So in this compilation, I revisited a handful of my favorite shop projects, some simple, some more involved, all designed to solve real problems. If you’re looking to improve your shop, there’s probably something here for you.
Cross-Cut Sled, The Ultimate Table Saw Upgrade
Watch the full video:
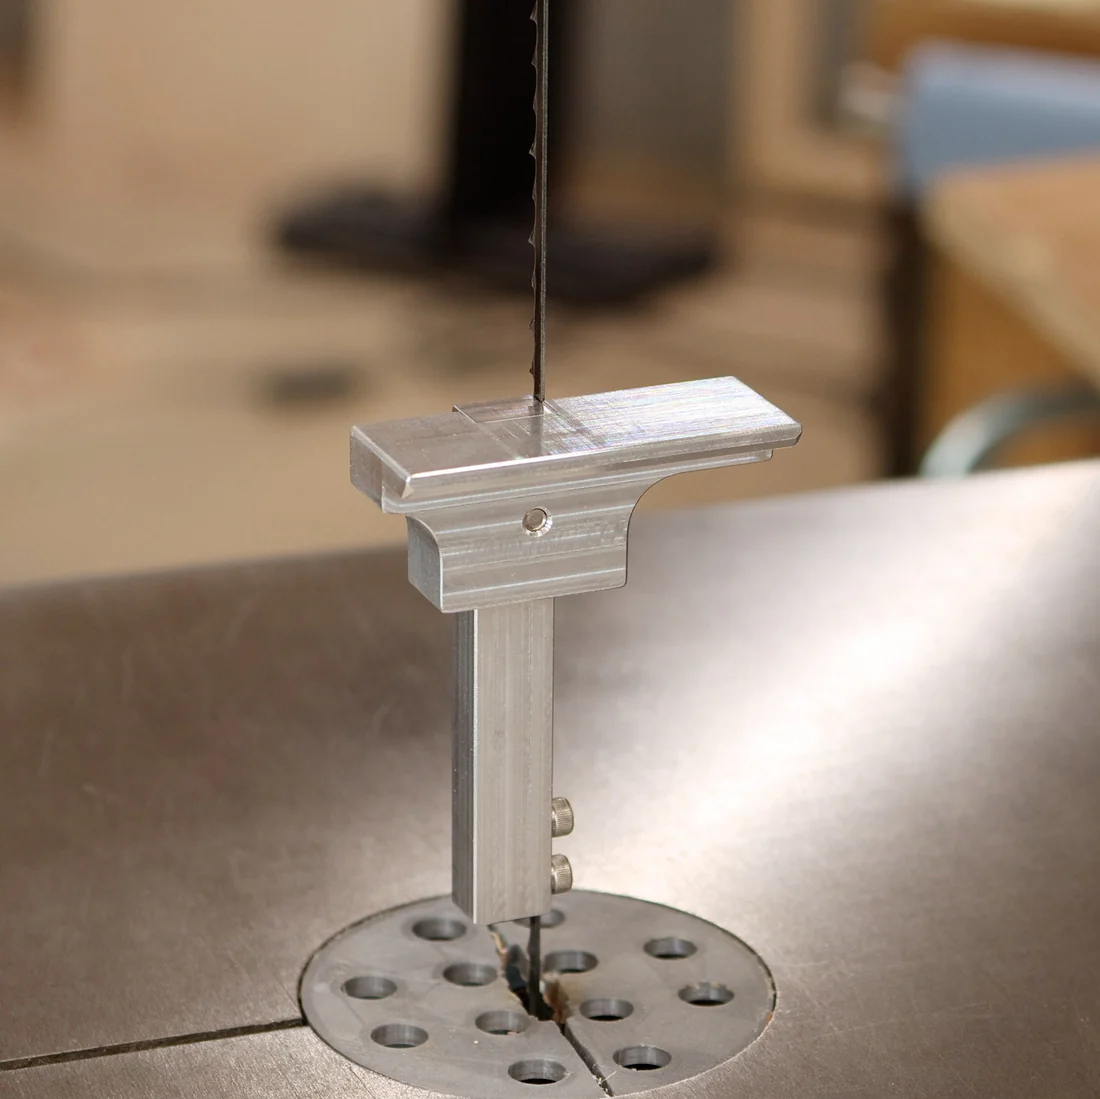
 Cross-Cut Sled
A good cross-cut sled is one of the most impactful upgrades you can make to your table saw. At its core, it’s simple, a base, two fences, and runners. But the magic is in how it supports the workpiece. Unlike a miter gauge, the sled keeps your stock fully supported and square to the blade throughout the cut. That means better accuracy, cleaner cuts, and improved safety.
This particular sled used an HDO fence and was dialed in using the five-cut method. Yes, it involves math. Yes, it can make you question your life choices. But when it’s done right, it’s dead accurate. These days I use an Incra 5000, but if you’re on a budget, a shop-made sled is a no-brainer.
Compact Plane Till, Storage That Works With You
Watch the full video:
Compact Plane Till
This is one of those projects that quietly becomes indispensable. The Compact Plane Till holds multiple planes, keeps them protected, and more importantly, keeps them visible and accessible. I’m firmly in the “don’t hide your tools” camp. If I can see it, I’m more likely to use it.
Built from cherry with a plywood back, this design balances durability with practicality. One lesson learned the hard way, don’t glue your dividers. Future-you will want flexibility. Add magnets for security, lay out your tools before building, and you’ve got a storage solution that will last for years.
Adjustable Height Work Support, Simple and Effective
Watch the full video:
Adjustable Height Work Support
This project proves you don’t need anything fancy to solve a real problem. Made from basic construction lumber, this adjustable support is perfect for breaking down sheet goods or supporting long workpieces. A simple pin system allows for height adjustments, and while it’s not infinitely adjustable, it gets the job done.
Would it be better with perfectly spaced drill press holes? Sure. Did it still work great with “close enough”? Also yes. Sometimes “good enough” is exactly what your shop needs.
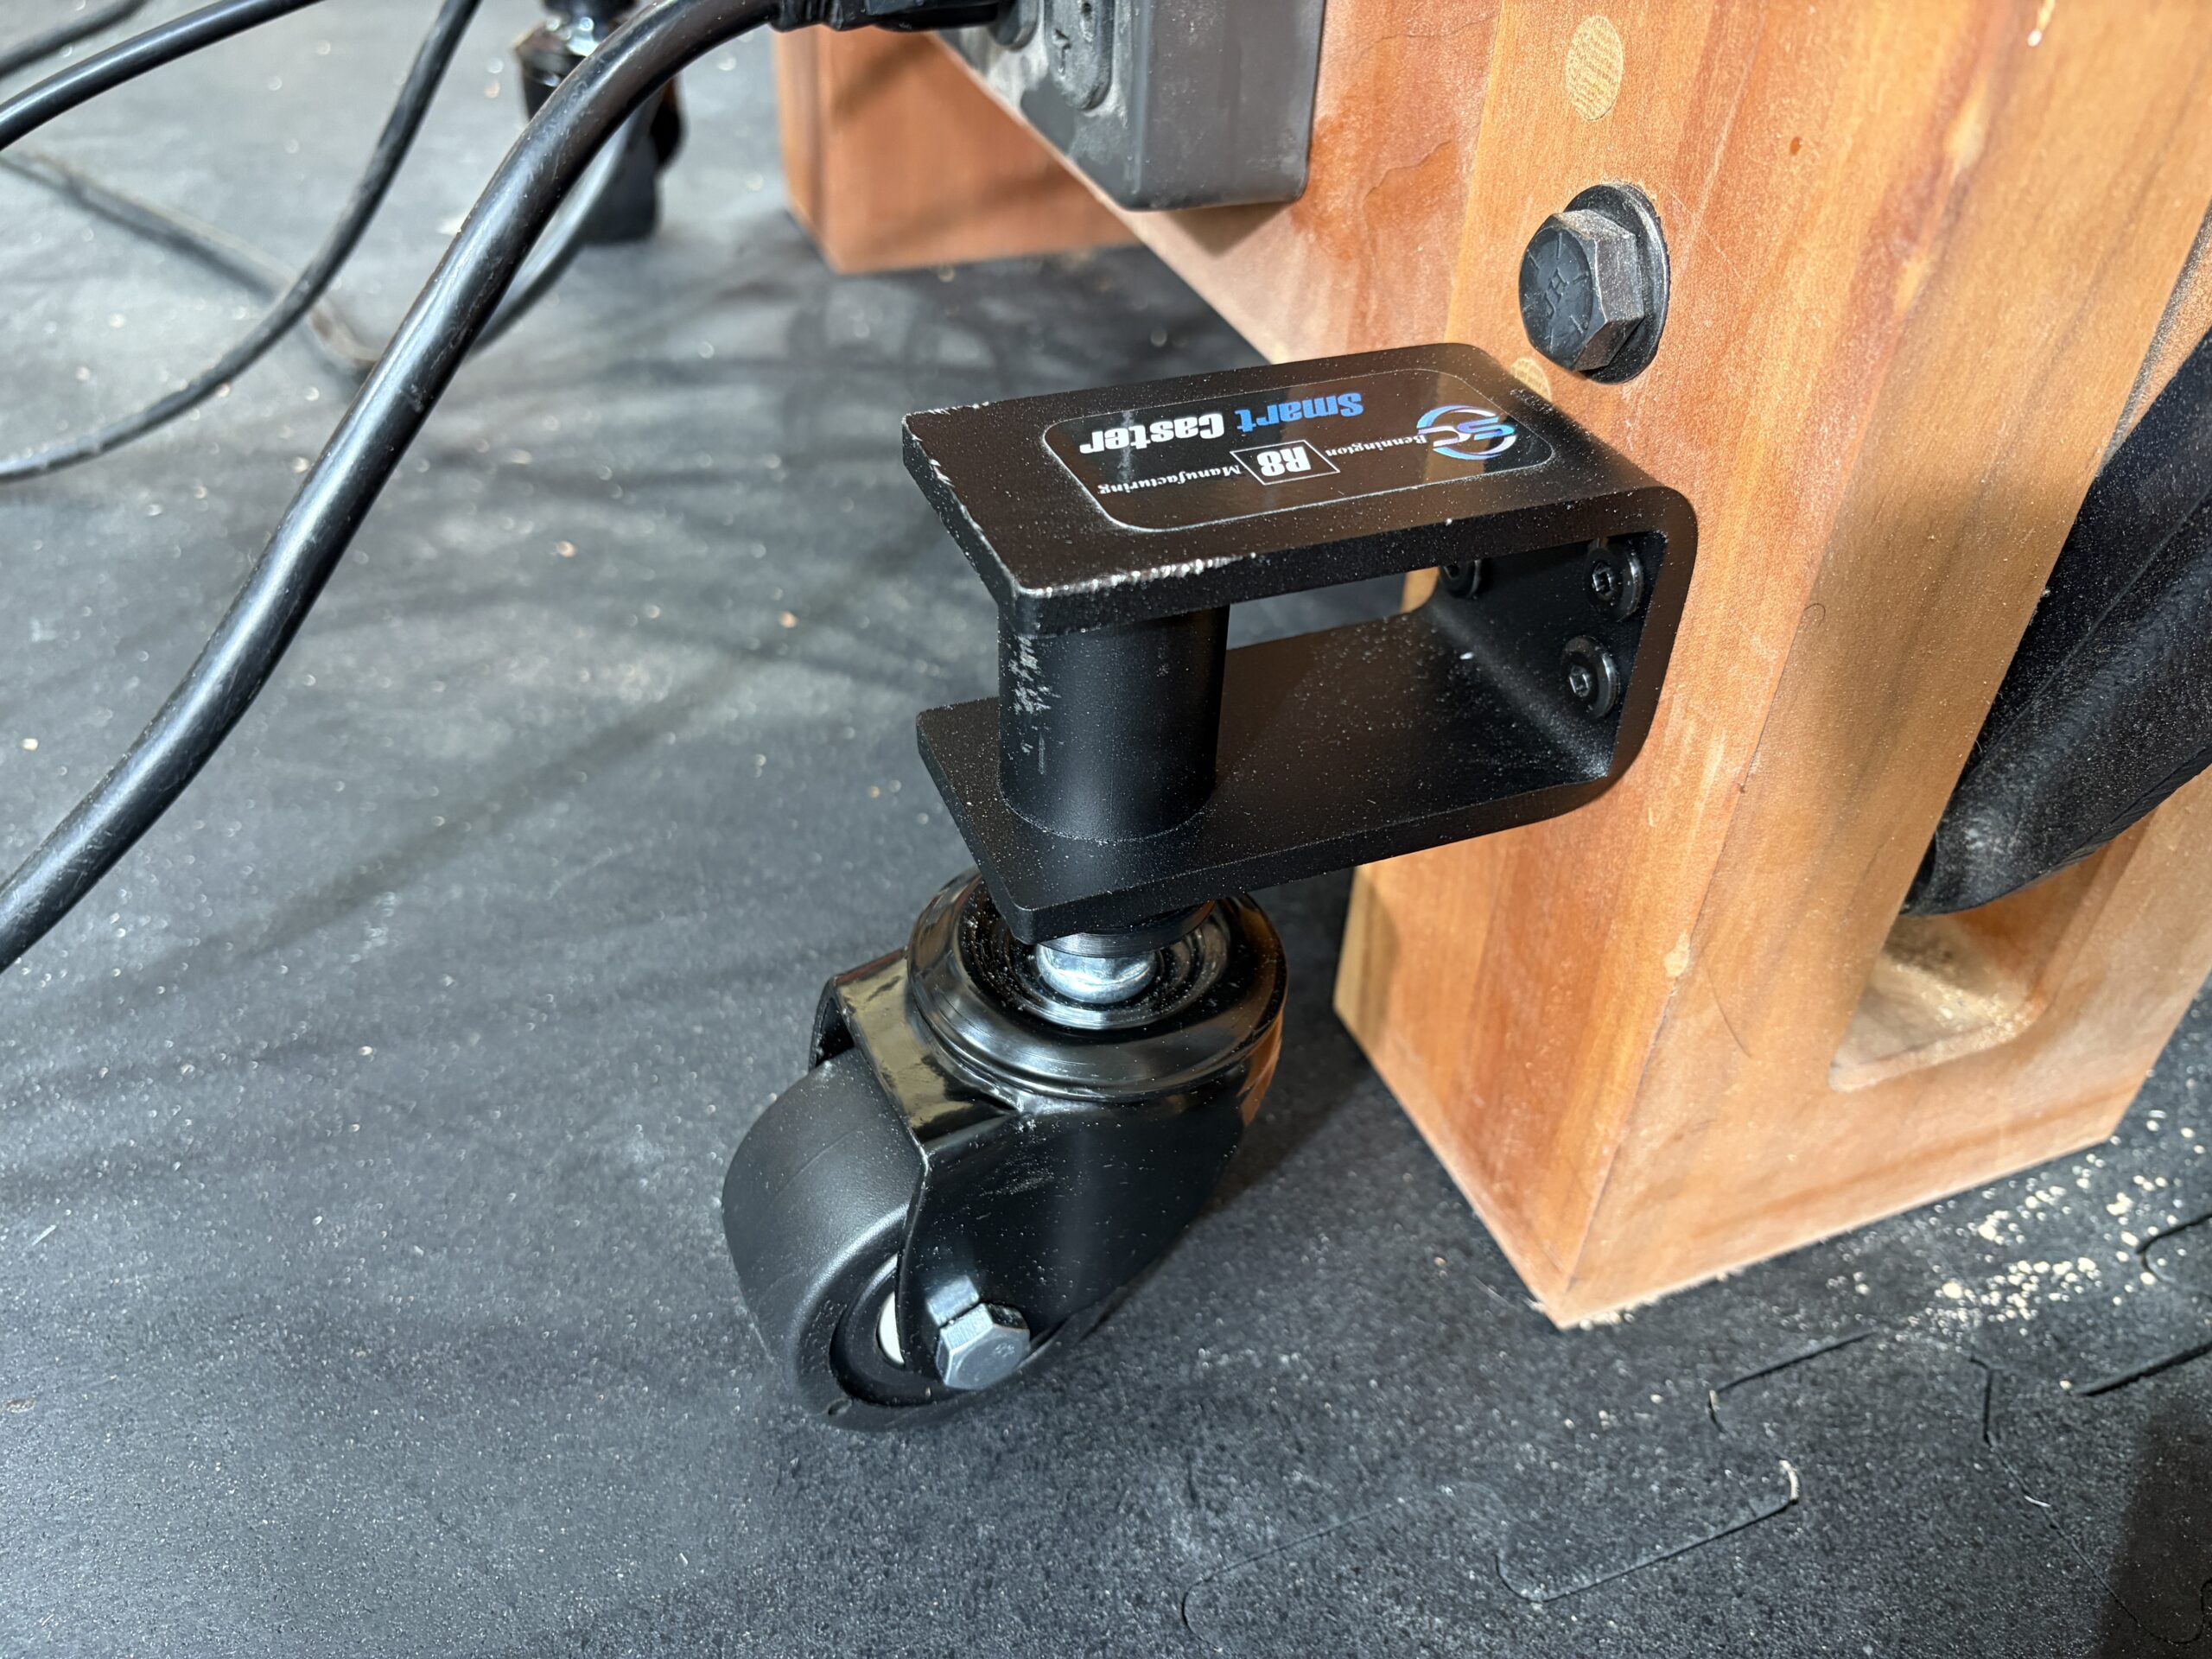
Giant Assembly Table, The Heart of the Shop
Watch the full video:
Giant Assembly Table
Every shop needs a solid assembly surface, and this one has been a workhorse. Built from southern yellow pine and topped with laminated plywood, this table embraces a key philosophy: mostly flat is flat enough. No torsion box required.
It also pulls double duty with storage, drawers, clamp racks, pegboard, making it a true central hub in the shop. If you’re going to build one big shop project, this might be the one.
Drill Bit Storage Cabinet, Small Upgrade, Big Impact
Watch the full video:
Drill Bit Storage Cabinet
Drill bits tossed in a drawer is a recipe for frustration. This cabinet organizes everything cleanly and protects your bits at the same time. Built from plywood with cherry accents, it’s a great example of using shop furniture to practice furniture-making skills.
Dados, rabbets, a mitered door with splines, this isn’t just storage, it’s a skill-builder. And the French cleat mounting makes it easy to hang and reposition as needed.
Drill Charging Station, Contain the Chaos
Watch the full video:
Drill Charging Station
If your cordless tools are scattered across the shop, this project is a game changer. With dedicated slots for drills, shelves for accessories, and space for chargers, it creates a centralized hub for your most-used tools.
It’s built entirely from plywood using simple joinery, but the impact on organization is huge. And yes, you might end up with extra slots…which is a great excuse to buy more tools.
Quick Shop Cabinets, Built for Your Space
Watch the full video:
Quick Easy Shop Cabinets
Custom shop cabinets are where things really start to click. In this case, the biggest challenge was a sloped floor. The solution? Build a level platform first, then build the cabinets on top of it.
This approach simplifies everything and avoids complicated cabinet adjustments. From there, it’s all about customization, drawers, doors, pullouts, whatever your workflow demands. And while hardware costs can add up, the efficiency gains are worth it.
Double Your Drawer Storage, A Simple Hack
Watch the full video:
Double Drawer Storage
This is one of those “why didn’t I do this sooner” projects. By adding a sliding upper tray inside an existing drawer, you effectively double your usable storage space.
It’s perfect for shallow tools, layout gear, pencils, and small accessories. And it requires minimal modification to your existing drawer. Simple idea, huge payoff.
Fancy Tool Holders, Because Why Not?
Watch the full video:
Fancy Walnut Tool Holders
Shop projects don’t always have to be purely utilitarian. These walnut tool holders bring a little style into the shop while still being incredibly functional. From chisel racks to scraper holders, each piece is designed around the tool it holds.
That’s really the key takeaway here, let the tool dictate the design. Also, magnets. Always a good idea.
Space-Saving Plywood Cart, Smarter Material Storage
Watch the full video:
Plywood Cart
Sheet goods storage can get out of hand fast. This cart solves that by creating a pivoting, wall-mounted system that keeps plywood accessible without taking up a ton of space.
Mounted on hinges with casters for support, it swings out when needed and tucks away when it’s not. It’s efficient, compact, and surprisingly easy to use, even when fully loaded.
Build a Shop That Works for You
Every shop is different. Different tools, different spaces, different priorities. But the common thread through all of these projects is intentionality. Each one solves a real problem. Each one makes the shop a little more enjoyable to work in.
And that’s really the goal.
Because when your shop works better, you work better. So if something here sparked an idea, run with it. Build it. Modify it. Make it your own.
Your future self will thank you.
The post 10 Must-Build Shop Projects (Jigs, Fixtures & Furniture) appeared first on The Wood Whisperer.
from The Wood Whisperer https://ift.tt/k6HsfaF
via
IFTTT


 Which machines and power tools are best for the grunt work of furniture making
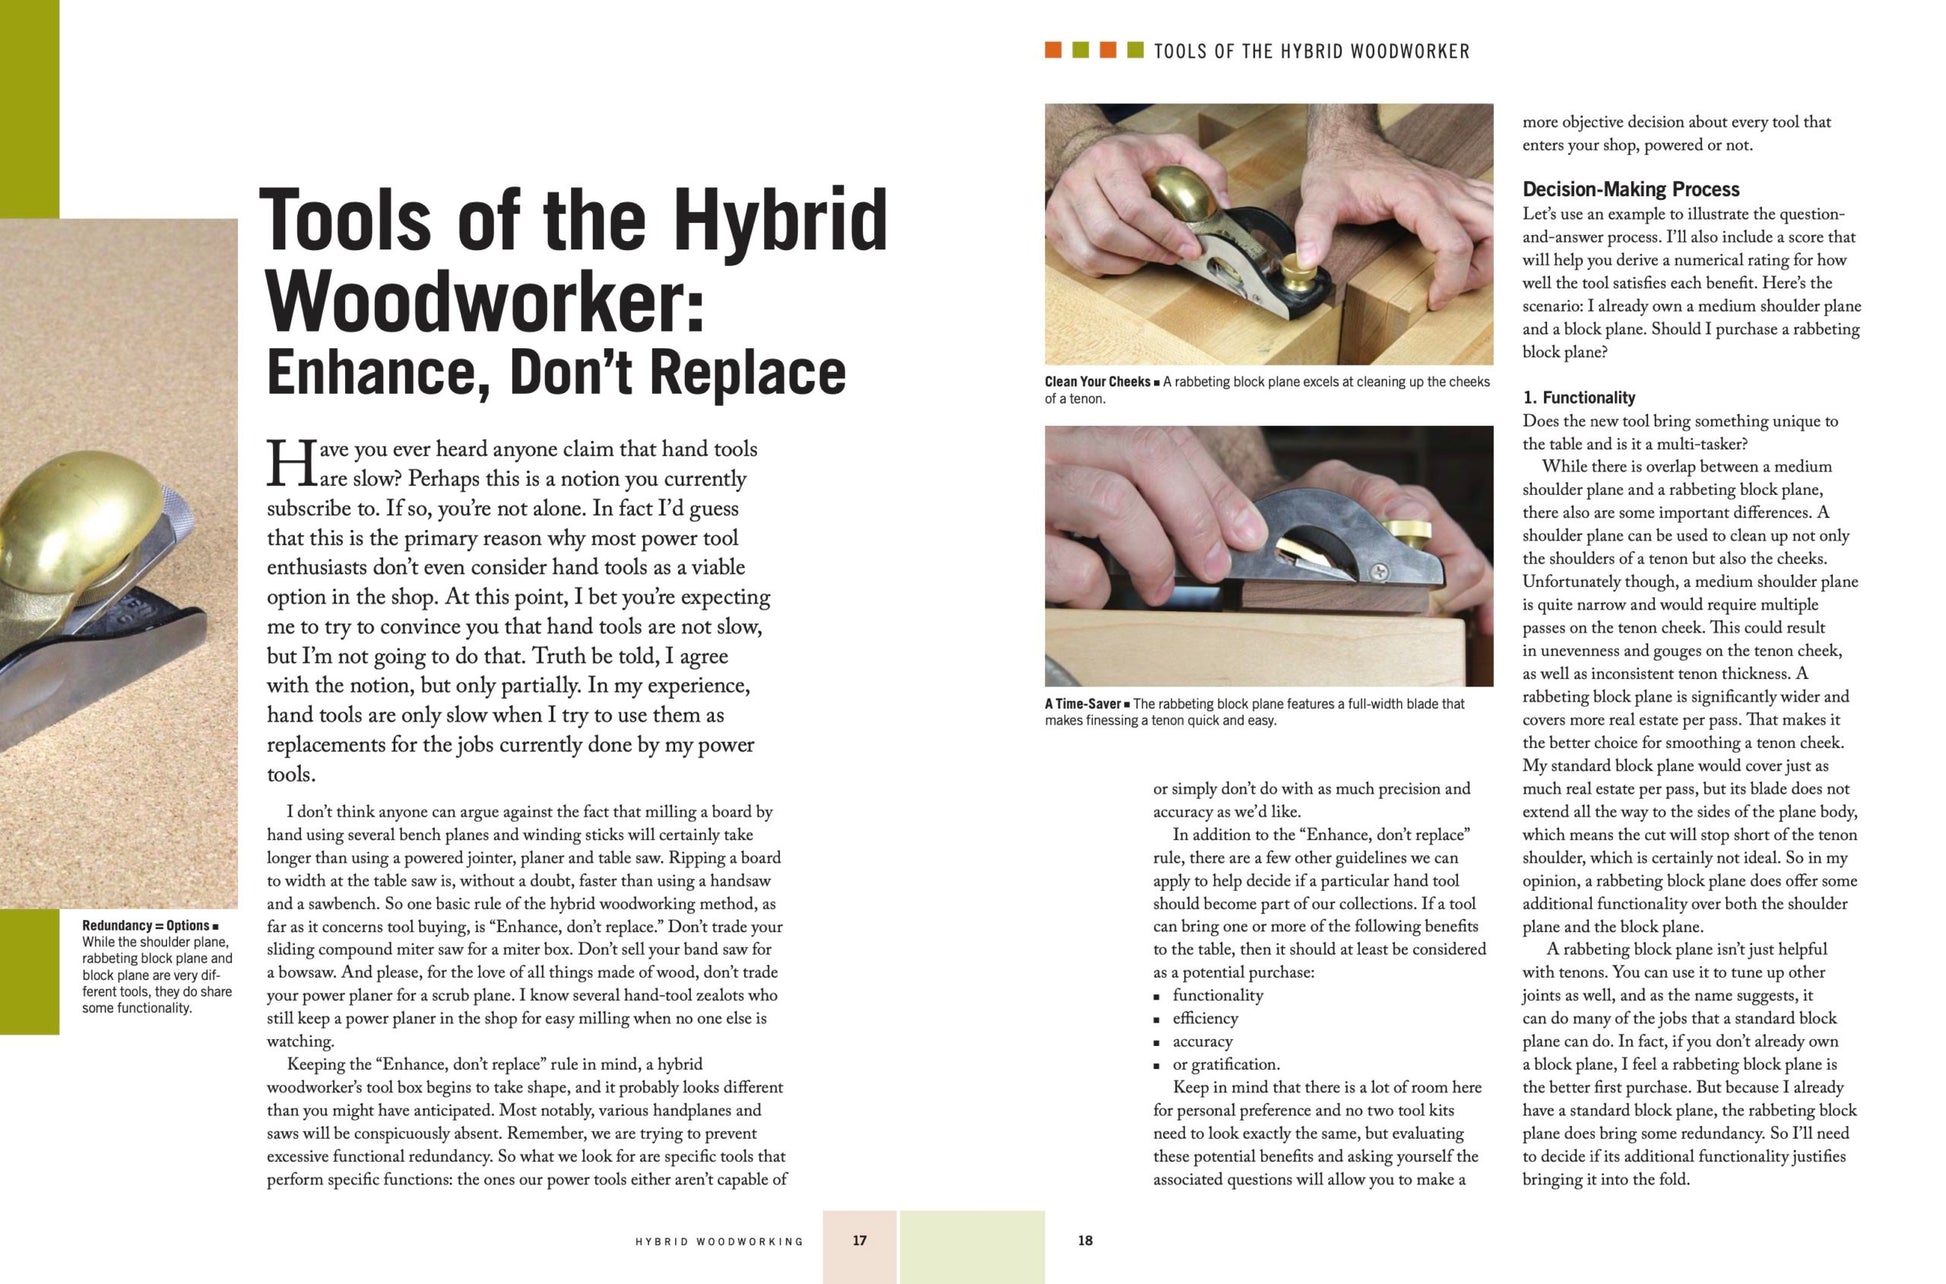
 Every copy is personally signed by Marc – something you won’t get if you buy the book on Amazon.

 3 Exclusive Bonuses
 Top 5 Planes for the Hybrid Woodworker
 Hybrid Woodworking Seminar
 Bonus Resources