Monday, March 30, 2020

Live Q & A Time Again!

Imagine the days a few decades ago when a man and a boy stood side by side and the man said, “That’s a good question, Paul. Best let me show you!” And he took the plane, flipped it around, end for end, upside down and side to side and taught the youngster all he knew…

Read the full post Live Q & A Time Again! on Paul Sellers' Blog.


from Paul Sellers' Blog https://ift.tt/2WS02Pt
via IFTTT

Saturday, March 28, 2020

George and I Dovetail

Notes from my journal: When George came into the workshop he parked his bike amongst the wood racks in the same place every day, slipped off his bike clips and clipped them to his crossbar. My eyes searched for his as he walked towards me but this day he seemed ever so distracted. He didn’t…

Read the full post George and I Dovetail on Paul Sellers' Blog.


from Paul Sellers' Blog https://ift.tt/2UrVGwZ
via IFTTT

Where’d Everybody Go?!

Show notes coming soon.

The post Where’d Everybody Go?! appeared first on The Wood Whisperer.


from The Wood Whisperer https://ift.tt/2UqcCUt
via IFTTT

Thursday, March 26, 2020

You would think that with everyone gone from the studio that I would have been able to optimise my output be that what it may. That’s not been the case thus far. I do miss the “Paul!” from the other side of the wall, the pressure of getting ready to film an intro for the…

Read the full post on Paul Sellers' Blog.


from Paul Sellers' Blog https://ift.tt/33KUAiY
via IFTTT

Wednesday, March 25, 2020

Online learning for Woodworking?

As a family with two young children, we know the challenges our teachers are facing as they transition to online learning. And shop teachers have the additional challenge of a topic that usually requires in-person instruction and hands-on experiences. You may or may not be aware that we accept donations throughout the year for a Guild scholarship fund and now we’re using those funds to supply shop teachers with opportunities for online learning. If you know a shop teacher who is struggling with this transition and who could make use of Guild projects for their students, please send them our way. Have them email Nicole mailto:nicole@thewoodwhisperer.com and we’ll do our best to accommodate their needs. If you would like to donate to the scholarship program, please do. I have a feeling we are going to get more requests in the coming weeks as schools likely won’t resume any time soon. We’ll make a public post in the future thanking everyone involved in the effort. – Be Safe, Be Kind, Be Well. Marc & Nicole

The post Online learning for Woodworking? appeared first on The Wood Whisperer.


from The Wood Whisperer https://ift.tt/3bvgDwv
via IFTTT

Tuesday, March 24, 2020

Working From Home…

…Make the Most of It if You Can Some of you have seized the opportunity that you may never have been able to before, to work from home. In some cases, you may have gained an extra hour or more in the morning and also in the evenings before you actually start work and then…

Read the full post Working From Home… on Paul Sellers' Blog.


from Paul Sellers' Blog https://ift.tt/2WNi7hw
via IFTTT

Hit ‘Em in the Nuggets

Show notes coming soon.

The post Hit ‘Em in the Nuggets appeared first on The Wood Whisperer.


from The Wood Whisperer https://ift.tt/3ac9p0l
via IFTTT

How to Apply Rubio Monocoat to Furniture

Rubio Monocoat has been around for quite some time now and I remember receiving a sample over 10 years ago back when epoxy was an adhesive and before slabs were discovered (sarcasm). Because the product boasted incredible levels of protection from something that appeared to be a simple oil, I pretty much dismissed it. Understand that at the time, I was doing a lot of client work and I was heavy into the HVLP game. An oil, no matter how advanced, just wouldn’t provide the protection and longevity of the film-forming finishes I preferred at the time. Since then, my preferences and sensibilities have changed and now I’m continually searching for the safest and most effective finish strategies. After using Rubio on numerous projects including a floor and millwork in my own home, I have to say I’m a convert. And while Rubio is a great product, it’s certainly not the only game in town and I have a renewed respect for what the world of hardwax oils can offer. By the way, Osmo is another product I like a lot and maybe I’ll do a similar application video on that in the future. Please note that this is not a sponsored video but I have received a couple of cans of finish from Rubio in the past.

Stuff I Use

Videos Referenced

  • Knock-Down Trestle Table Build – https://ift.tt/2Ujbtyh
  • Step Stool Build – https://ift.tt/33IEUMW
  • Wiping Varnish Shootout – https://ift.tt/2vP2DPe
  • Art Easel – https://ift.tt/3dsWZ6r

Applying Rubio Monocoat

Applying Rubio is a simple 4-step process. The tools and techniques you use to accomplish these steps can vary.

  • Prep the surface
  • Spread the Finish
  • Buff the Finish
  • Remove the Excess

To prep the surface, sand through the grits to 180. Rubio usually recommend not sanding past 150 because the oil binds more effectively at lower grits. I sand to 180 and haven’t found it to be a problem. After 180, water-pop the surface by spraying liberally with water. After it dries, sand lightly again with 180 to knock down the raised grain. Vacuum the surface with a vacuum and brush attachment then wipe the surface down with a cloth and some mineral spirits.

Mix 3 parts of the Oil Plus 2C A with 1 part of the Oil Plus 2C B. Be careful not to mix more than you need. A little bit goes a long way. I usually use Pure which is essentially clear. Rubio comes in various colors and don’t be confused by their Natural product, as it is NOT clear. By the way, you don’t have to use the accelerator. The finish will just take longer to cure: 3 weeks vs 7 days with the accelerator.

Drizzle the finish on the surface and use a plastic spreader or white scotch bright to spread the finish over the surface. Don’t do anything you can’t finish within 15 minutes. Any longer than that and the finish becomes hard to remove. Once coated, buff the finish in using a white pad on a sander or manually with a white scotch bright pad. This step not only helps spread the finish but also helps drive it deeper into the wood.

The final step is to remove all traces of finish from the surface. I use a small buffer with a terry cloth bonnet installed when possible. When not possible I just use clean shop rags. The way Rubio works, the wood takes what it wants and anything else left on the surface is just a liability as it tends to get sticky and gummy. So after the cleanup step I’ll take a clean cotton cloth and quickly go over the surface one last time. This isn’t always necessary but sometimes you’ll find a spot you missed so it’s a good safeguard.

Now let the piece sit for 24 hrs before handling and remember, it takes 7 days to fully cure.

While this single coat is all you need, I personally like to take it one step further by using their Universal Maintenance Oil, applied exactly the same way the next day. If you’re coming from the world of film finishes, this step will make you much happier with the appearance as it gives it just a bit more of a sheen.

The post How to Apply Rubio Monocoat to Furniture appeared first on The Wood Whisperer.


from The Wood Whisperer https://ift.tt/3boF9zG
via IFTTT

Monday, March 23, 2020

My 400,000 Subscriber YouTube Giveaway

To celebrate reaching 400,000 subscribers on YouTube, I am doing a giveaway! I am giving away: One of my tenon saws A signed copy of my book: Essential Woodworking Hand Tools A 6-month premium membership to our Woodworking tutorial site, Woodworking Masterclasses. To see the prizes, watch my video on YouTube. You can enter here.…

Read the full post My 400,000 Subscriber YouTube Giveaway on Paul Sellers' Blog.


from Paul Sellers' Blog https://ift.tt/2QEvv3S
via IFTTT

Sunday, March 22, 2020

It’s a New Day

My woodworking has always been at the forefront of all that I do. Waking in these present days makes me realise how much things have changed in the last few weeks and even days. Riding my bike (in self-isolation) and seeing the world so differently than even two days back made me realise that we…

Read the full post It’s a New Day on Paul Sellers' Blog.


from Paul Sellers' Blog https://ift.tt/2WCs9lE
via IFTTT

Saturday, March 21, 2020

Designs for Learning Woodwork

Over the course of the past two weeks, I found myself f reflecting on pieces I designed two and three decades ago specifically to help those focussing on developing their knowledge and skill in real woodworking. The pieces are indeed many a dozen ranging from my traditional English Joiner’s workbench all the way through to…

Read the full post Designs for Learning Woodwork on Paul Sellers' Blog.


from Paul Sellers' Blog https://ift.tt/33DbGis
via IFTTT

Thursday, March 19, 2020

Staying Safe!

Read the full post Staying Safe! on Paul Sellers' Blog.


from Paul Sellers' Blog https://ift.tt/33wG6mA
via IFTTT

Wednesday, March 18, 2020

Mini Trebuchet

Stuck in the house with the kids? Us too. So we’re passing the time by doing something fun and productive, like building this sweet Mini Trebuchet! The project is made using basic tools (Saw, Drill, and Hand Saws) and is glued together with Titebond Quick & Thick so we’re not waiting around for parts to dry. You’ll also need some 1/2″ thick wood or plywood, string, a couple of screw eyes, and a thin metal or wood dowel. A quick trip to the hardware store and you should have everything you need.

You can built this project in an afternoon with the kids. It’s a great way to pass the time. Just be sure you don’t launch anything that can poke out an eye.

Download the FREE Plan here: Mini-Trebuchet Plan

The post Mini Trebuchet appeared first on The Wood Whisperer.


from The Wood Whisperer https://ift.tt/3a1Ke0t
via IFTTT

Monday, March 16, 2020

Workbenches That Work

I have made workbenches the way I have to put them into realms of real woodworking for everyone. I am sure some brutes can shove them around their workshops as they work but I can’t, never have. I had my doubts the day we set up two sawhorses, a Black & Decker Workmate and a…

Read the full post Workbenches That Work on Paul Sellers' Blog.


from Paul Sellers' Blog https://ift.tt/38WI294
via IFTTT

Sunday, March 15, 2020

More Creative Space

I don’t always find spaces conducive to my creativity. Mostly, I find I don’t so much create them but more end up in them. In my own home, a single noise can distract me from writing and a simple question can often become quite invasive. I have heard and met people who installed a down-the-bottom-of-the-garden…

Read the full post More Creative Space on Paul Sellers' Blog.


from Paul Sellers' Blog https://ift.tt/2UaJ4sy
via IFTTT

Friday, March 13, 2020

A Case of the Runs

00:00:33 - Video starts
00:00:50 - It's The Woodworking Morning Show
00:01:54 - Thanks to our new Patreon subscribers
https://www.patreon.com/woodwhisperer
00:04:15 - Premium project plans
Store

00:08:10 - Egyptian Magic plug
00:09:35 - Are you stocking up on building materials due to potential closures. 
00:11:13 - Have you ever made a roll top desk mechanism for cupboards?
00:12:13 - Can you spray Danish oil?
00:15:20 - Can I seal in finishes to prevent off-gassing in the interior of drawers?
00:19:00 - How can I get the best result of a panel glueup?

00:20:30 - Would you recommend a track saw square or a larger square if budget allows for one?
00:21:55 - How much room should I leave on every side of my table saw?
00:24:30 - What oversized pattern bit would you recommend?
Big Daddy Gold

Essential Joinery Book

00:28:35 - How can I promote even clamping when gluing up two 4/4 boards to make an 8/4?
00:31:40 - How can I handle nosy neighbors if I work with the garage door open?
00:34:15 - Are there any lathe projects in the future?
Nesting Tables

00:35:14 - Why is woodworking so addictive?
00:37:30 - What would you do if you found yourself with an abundance of shop time?
https://jtwood.works/
00:40:25 - How can I get my pictures added on the free site?
00:43:05 - How can I finish coasters made from maple, padauk, and purpleheart?
00:44:50 - When are you going to put up more guild projects?
Changes for 2020

00:46:50 - Any update on the budget tool project?
00:50:30 - Any update on the card scrapers?
https://thewoodwhispererguild.com/product/tww-card-scraper/

The post A Case of the Runs appeared first on The Wood Whisperer.


from The Wood Whisperer https://ift.tt/2IKaXmb
via IFTTT

Wednesday, March 11, 2020

Edge Sharpening Under £10

Today I thought I might share with you how in my day to day I often take 10 edge tools from dull to maximised sharpness levels in somewhere around five minutes max. I do also sharpen tools individually too because, after all, they rarely all dull at once. I know hand on heart that I…

Read the full post Edge Sharpening Under £10 on Paul Sellers' Blog.


from Paul Sellers' Blog https://ift.tt/3cQ4DHB
via IFTTT

Tuesday, March 10, 2020

10 Tips for Wide Panels that Stay FLAT

Panel glueups seem easy but a lot of folks are in for a rude awakening when the panel doesn’t stay flat. Here are 10 tips and tricks that should help stack the cards in your favor for a nice flat glueup.

1. Use stable, dry wood.

Inspect your boards for cups or twists and try to find boards that are already mostly flat. A heavily-twisted board can be milled flat, but there’s a good chance it will return to that warped state so it’s not a good candidate for a panel. Also, be sure the wood is dry and well-acclimated to your shop environment. I like to make sure my boards are in my shop for a few weeks before incorporating them into a panel.   

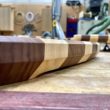
2. Consider the grain.

Great looking panels don’t happen accidentally. Make your grain arrangement purposeful. Most times I try to orient the grain so it gives the illusion of a single panel. On my executive desk I took it a step further by intentionally butting up sapwood to sapwood so that the joint became harder to see. Sometimes I’ll also create a bookmatch pattern, such as with crotch wood, to make the joint part of the design.

3. Mill the boards evenly.

When milling your boards, make an effort to count the number of passes so that you remove the same amount of material from each face. This should help keep the board balanced as it acclimates to the environment. Wood is a lot like a sponge. It readily absorbs moisture. And as it dries, there’s more moisture deep inside than there is at the surface. As long as it picks up and loses moisture evenly, it stays relatively flat. But if we take too many passes on one face of a board, it knocks it out of equilibrium and the board will cup. Any time we have more moisture on one side than the other, there’s a potential for cupping.

4. Ensure 90 degree edges.

Don’t just look at the fence of your jointer. Look at the wood itself after jointing. Many jointer fences aren’t perfect so it’s the result of the cut that really matters. Your fence doesn’t actually need to be at a perfect 90 if you joint your boards in such a way that it negates the angle. When you unfold them, they will offset each other.

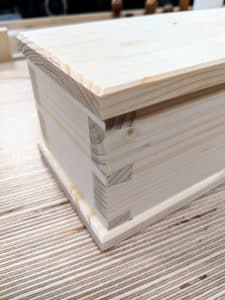
5. Use alignment aids to help keep your boards flush.

With glue in the joint, the boards will slip and slide around and it can be hard to keep the boards flush, especially on larger glue-ups. If you use biscuits, dowels, dominos, or even a splines and tongue and groove joints, you can make your life a LOT easier as the boards will stay nice and flush during the glueup. On smaller panels, you can actually just use a clamp at each joint to keep the panels flush. On larger panels you might also consider using cauls. These are simple strips of wood that are coated in wax or packing tape to prevent the glue from sticking. They sandwich the glueup making sure everything stays flat. You also might want to look into cambered caul, where there’s a slight hill in the middle. The advantage here is that just by clamping the outsides of the cauls, you’ll have a great deal of pressure at the center too, which is very effective on big glueups where you can’t get clamping pressure in the center of the panel.

6. Use a glue that matches the color of the wood.

Glue comes in a lot of different colors and if you use one that’s close to the color of your lumber, you can further help disguise the joint. And did you know you can add dye to glue to get custom colors? Sometime I add Transtint dyes to get a unique color.

7. Clamp properly.

First, make sure you use enough clamps. A good rule of thumb is to space the clamps on the 45’s. If you imagine the clamping pressure spreading out at a 45 degree angle in both directions, you simply make sure there are no uncovered areas. Narrow boards require more clamps and wider boards require fewer clamps.Because clamps can sometimes put uneven pressure on joints, I like to alternate my clamp orientation too.

When applying pressure, especially when you don’t have alignment aids, start with a small amount of pressure at each clamp. This allows the glue to squeeze out and gives the boards a chance to get grippy while still staying flat. Clamp too fast on any one clamp and the pieces will just slide around.

8. Scrape the excess glue.

If you let the glue dry on the surface and then try to scrape it away, the glue drops can take some wood with them. So I like to give my panels at least 30 minutes to set up before scraping away the glue. At this point, the glue is still flexible and comes off easily with a putty knife without tearing out wood or spreading glue all over the place. Be sure to remove the glue from between the clamp bar and the wood to help prevent staining.

9. Let panels rest on end, not on a face.

Inevitably you’ll need to leave your panels overnight and this is where the surprises can sometimes happen. I like to let my panels breathe so I prop them up slightly or rest them on their side. This helps provide even air flow on all sides of the panel and promotes flatness. If for some reason you need to leave the panels for an extended period of time, consider stretch wrapping. The plastic will slow down the penetration of moisture into the wood and the pressure of the bundle will help encourage flatness. With any luck, the panels will be nice and flat when you’re ready for them. Keep in mind if you’re in a very humid shop, you’ll want to watch for moisture accumulation and mold. In Denver, this just isn’t a problem. And while the stretch wrap can buy you a couple of days or weeks, you really don’t want to let the panels sit around for a long time. Try to minimize the time between the glueup and the incorporation into your project.

10. Don’t rush!

Don’t be in a hurry to sand your panel. Even though I might take my panels out of the clamps after a few hours, I don’t sand them for at least a day. Remember, most of the glue we use is water-based. That water absorbs into the fibers and causes the area around the glue line to swell. If you sand while it’s swollen, it may be flat for a while but once the remaining moisture leaves the glue line and the fibers shrink back to normal, you’ll actually end up with a groove in the surface. So it’s best to give the panel a day or two to cure before tackling the final surface prep.

So those are my top 10 tips for better panels. There are lots of other strategies and here’s some honorable mentions that you might consider:

  • Protect your clamps. Lay down paper or tape on clamp to prevent your clamps from getting all gunked up. At the very least, wax them periodically so the glue pops right off.
  • Consider sprung joints. This classic method for joining panels can be handy if you’re short on clamps. A little dip is created in each joining edge, allowing you to use a single clamp at the center of the panel and getting nice even pressure across the entire joint.
  • Don’t starve the joint of glue. If you don’t see squeezout, you’re not using enough. At the same time, don’t be wasteful. If it’s dripping all over the place, you’re just wasting glue.
  • If you have the time and material thickness, consider a partial mill process where you flatten the board, let it sit for a few days, then go back and flatten it again just before glueup.

Now here are some things you may have heard about, that I don’t think are that important:

  • You must have glue on both mating surfaces. I usually try to coat both surfaces but it’s not the end of the world if I don’t. I just make sure I put a little extra so there’s enough to go around.
  • You should clamp the shit out of the panel. You only need to clamp enough to close the joint and cause squeezout. If you’re straining to tighten each clamp, something is wrong. Good consistent pressure is all you need.
  • You have to alternate end grain. I don’t bother. My goal is to get the best presentation possible on the face of the panel. The end grain is secondary. The thinking here is that alternating end grain will help the overall panel stay flat if/when the panels cup according to their nature. So instead of one big cup, you end up with a wavy surface. Should this ever occur, I’d much rather have one big cup that can hopefully be tamed by attachment to a solid base, rather than a washboard effect.

All of this advice is just my personal opinion from my own experience. And as we know in woodworking, there’s almost always more than one right answer. I hope this list helps you achieve stable flat panels. Remember, wood is a natural product. In spite of your best efforts, sometimes, the wood is dumb and just does what it wants to do. So don’t be too hard on yourself if things go sideways at some point.

The post 10 Tips for Wide Panels that Stay FLAT appeared first on The Wood Whisperer.


from The Wood Whisperer https://ift.tt/2xm21AU
via IFTTT

Monday, March 9, 2020

HealthinessWoodworking

It will surprise many of you that in times past I set up my woodworking designs for machine-only methods that required me to spend 8-10 hours days operating two or three machines hour on hour. The orders kept coming in and I had set up mini production lines for the different products I made. The…

Read the full post HealthinessWoodworking on Paul Sellers' Blog.


from Paul Sellers' Blog https://ift.tt/3aGCNvo
via IFTTT

Sunday, March 8, 2020

People Send Me Links…

… but in the sending, I can tell that, whereas 99% of people have come to understand my efforts in reversing the trend of machine-only woodworking and then too the myriad other distractive sources, some have yet to understand. Not getting it is fine, sometimes it takes time to dismantle preconceived ideas and programming from…

Read the full post People Send Me Links… on Paul Sellers' Blog.


from Paul Sellers' Blog https://ift.tt/2PUdmOX
via IFTTT

Saturday, March 7, 2020

Thoughts On the House

My mind races some times, most days, tracing a thought, a passage of thinking about the house interior coming along with finished rooms being made ready for me to design the pieces for. A chair, a table, a new rocker design. These things float in and out in the room space I picture in my…

Read the full post Thoughts On the House on Paul Sellers' Blog.


from Paul Sellers' Blog https://ift.tt/3cGXusS
via IFTTT

Friday, March 6, 2020

Sensual Hot Dog

2:04 – Marc has a new shirt on!
2:36 – Welcome to The Woodworking Morning Show!
2:55 – Thanks to all of our Patreon supporters!
https://www.patreon.com/woodwhisperer
3:43 – Pens are currently delayed
4:25 – The Easter egg last week was a small blue penis
5:14 – Nicole made Marc’s new shirt!
6:21 – Thank You Nathan!
7:19 – Circle templates now available in the TWW Store!
10:30 – Should you explain\market why your pieces are worth charging more?
14:42 – When should you pre-raise the grain before finishing?
17:11 – Do you have advice on what tool to use to smooth wood when working over knots and twisted grain.
19:40 – How did you end up being on a panel at WorkbenchCon?
21:55 – Any suggestions on chisels outside of Blue Spruce?
24:37 – What’s your favorite double sided tape?
26:15 – Do you have any suggestions about the Portamate mobile base?
27:24 – Do you have suggestions for simple projects for students?
29:55 – Do you have any advice on must have features for dust collection?
32:06 – Jet is having a 10% off sale until 3/16!
33:00 – What’s the best finish to use when UV exposure is a problem?
35:08 – Would you explain more about your beginner course that you are working on?
39:21 – Marc is working with Andy on a Tapering Jig
41:08 – What’s your approach to sanding and finishing?
43:13 – Any way to stop a dust collector being plugged up when using a planer?
46:58 – Is there any easy way to connect dust collection to my PM 14″ bandsaw?
48:29 – Do you use the factory blade on your Kapex?
51:05 – When working a slab, would you fill checks and cracks with epoxy before flattening?
53:22 – Thanks For Watching! You can listen on most podcast sites!
55:05 – Guild project winner!

The post Sensual Hot Dog appeared first on The Wood Whisperer.


from The Wood Whisperer https://ift.tt/2TNyjwc
via IFTTT

Making

Some words seem strange to me. Perhaps it’s my age. Making seems always to be, well, constructive, a sort of building word. In my world, it’s taking something quite raw and mostly all-natural and reforming it in some way to transform it into something useful and pleasing to look at. Mostly this is without decrying…

Read the full post Making on Paul Sellers' Blog.


from Paul Sellers' Blog https://ift.tt/3cMk6IO
via IFTTT

Thursday, March 5, 2020

Guitar Pick Cutting Board

Remember that end grain cutting board I made in 2006? It has served my family well but I think it’s finally time to retire it due to cracking and warpage. End grain cutting boards are certainly beautiful but they can also be problematic thanks to all of the glue joints and exposed end grain. To replace it, I came up with a simple triangular design that has three feet, so the board will never wobble. The shape is taken directly from an image of a guitar pick which happens to have the soft three-sided/rounded shape I wanted. Of course a triangle isn’t the ideal shape for a cutting board, but at 16″ wide this board still gives me plenty of room to work. The use of maple and walnut makes the board a conversation piece and it makes a wonderful gift.

The shape of this If you’d like to make one, you can purchase a CNC-Cut Template here.

Or you can print a pattern and make your own template with this PDF. 

Stuff You Need

The post Guitar Pick Cutting Board appeared first on The Wood Whisperer.


from The Wood Whisperer https://ift.tt/3awldu0
via IFTTT

Wednesday, March 4, 2020

More Low-down on Workbenches

After 55 years of manual working my back still holds strong and that is from standing work at a workbench six days a week for 8-10 hours a day. My neck feels comfortable too, quite as good as ever. If suddenly something went wrong I could hardly complain after so many good years. Short term…

Read the full post More Low-down on Workbenches on Paul Sellers' Blog.


from Paul Sellers' Blog https://ift.tt/3ctwjBT
via IFTTT

Tuesday, March 3, 2020

Palletwood or Pallet Wood?

Of course, pallet wood is not a species, mostly it’s a low-cost shipping and distribution pallet material taken from fast-growing softwood timbers meaning pine, fir, spruce and similar. What is important to logistics companies is its low-cost availability and that it is sustainable and pretty much self-perpetuating. So often I see two camps when softwoods…

Read the full post Palletwood or Pallet Wood? on Paul Sellers' Blog.


from Paul Sellers' Blog https://ift.tt/2ThUED9
via IFTTT

Monday, March 2, 2020

A Sharp New Look

In a communal workshop, it makes sense to have a central sharpening station for all to use and that’s what I just completed in the bench shop next door. As more and more people begin to use the benches it makes sense to relegate sharpening to a central point and that is what I used…

Read the full post A Sharp New Look on Paul Sellers' Blog.


from Paul Sellers' Blog https://ift.tt/3cmUaD8
via IFTTT