Friday, December 17, 2021

The Ultimate Hybrid Roubo Workbench

Here it is! The bench of your dreams. Well, it’s the bench of my dreams at least, but I think you’ll like it too. It’s sturdy, built to last a lifetime, and contains features that service power tool woodworkers, hand tool woodworkers, and everything in between.

Get the plans and full course here!

Stuff I used:

The post The Ultimate Hybrid Roubo Workbench appeared first on The Wood Whisperer.


from The Wood Whisperer https://ift.tt/3GOLdkw
via IFTTT

Friday, November 19, 2021

End Table Deep Dive

I needed an end table and had a breadboard top I made in a previous demo, so I built a base to go with it. This video is a pretty extensive “teaching” video with lots of details about my process, including making and using templates and the use of the Festool Domino. It’s also the first time I used my CNC to generate an actual project part. I hope you enjoy!

Important Links

The post End Table Deep Dive appeared first on The Wood Whisperer.


from The Wood Whisperer https://ift.tt/3HBDgjY
via IFTTT

Friday, October 29, 2021

The Last One, For Now | TWW Live

Show notes coming soon.

The post The Last One, For Now | TWW Live appeared first on The Wood Whisperer.


from The Wood Whisperer https://ift.tt/3Bxbd0K
via IFTTT

I’m Getting Rid of my Roubo | New Workbench Tour

The original Split-Top Roubo Workbench is a classic, and a beast in terms of size and cost. Over the years I’ve heard a lot of feedback from woodworkers looking for a “lifetime workbench” but one that doesn’t break the bank. They were also looking for a somewhat smaller bench, with knock-down construction and mobility in mind. Add in a little bit of Spag-flair and what we have is the new Hybrid Workbench.

You can pre-order the Guild course now for only $30 (Price increases after Dec. 3rd)

The new bench is packed with great features that will satisfy power tool woodworking, hand tool woodworking, and the kind of woodworking I do: Hybrid Woodworking. By the way, I wrote a book about Hybrid Woodworking that you might want to check out.

So what’s happening to the old bench? We’re auctioning it off for charity. The charity is Rob Cosman’s Purple Heart Project. Place your bid here.

Relevant Links

The post I’m Getting Rid of my Roubo | New Workbench Tour appeared first on The Wood Whisperer.


from The Wood Whisperer https://ift.tt/3ErZa6L
via IFTTT

Friday, October 15, 2021

Spit-takes & Karate Moves

Show notes coming soon.

The post Spit-takes & Karate Moves appeared first on The Wood Whisperer.


from The Wood Whisperer https://ift.tt/3G1RJVE
via IFTTT

Don’t Make These Lumber Mistakes!

I imagine most people think wood is a fairly simple material. But the more you work with it, the more you can appreciate the subtle peculiarities of wood and what it takes to work with it effectively. Over the years, I’ve made a number of mistakes with regard to purchasing and cutting lumber and plywood and hopefully this list of tips will save you some heartache.

  • Wood Moves After Milling
  • Wood Can Move During a Cut
  • Plan for Expansion and Contraction
  • Don’t Cheap Out on Plywood
  • Crap In, Crap Out
  • Buying Thicker Lumber and Resawing Is Not Cheaper
  • Shop Around for Best Price
  • Finish Doesn’t Forgive Crappy Wood
  • Learn to Paint With Grain

The post Don’t Make These Lumber Mistakes! appeared first on The Wood Whisperer.


from The Wood Whisperer https://ift.tt/3BNrNu6
via IFTTT

Friday, October 1, 2021

So I Changed My Mind! | Woodworking Tips!

If you do woodworking long enough, you’ll undoubtedly change your mind about a few things. I think it’s a good sign as it shows you’re open-minded and willing to take in new information. Never stop learning.

The post So I Changed My Mind! | Woodworking Tips! appeared first on The Wood Whisperer.


from The Wood Whisperer https://ift.tt/39W2tpD
via IFTTT

Friday, September 17, 2021

You Janka My Chain! – TWW Live

Show notes coming soon.

The post You Janka My Chain! – TWW Live appeared first on The Wood Whisperer.


from The Wood Whisperer https://ift.tt/3EsDzMk
via IFTTT

2021 Guild Scholarship Recipients

We are extremely grateful to everyone that applied. There were so many worthy applicants (we had over 100 to review), that it really was a difficult process to narrow it down to just 12 woodworkers. Thankfully we have a very generous group of Guild members and they were able to donate enough for 22 more scholarships! If you didn’t receive a scholarship this time, please do not get discouraged. We will be opening the Scholarships back up in June/July of 2022 and would love to see you apply again. If you feel you need guidance on the application next time, please read some of the tips on the Scholarship page before submitting your next application.

So without further ado here are the 34 recipients of The Wood Whisperer Guild. Congratulations to all of them!

Marc and I wish you continued success in your woodworking journey! Best, Nicole

3 Student Scholarships
Aidan Barker
Sean Staniforth
Joel Louwerse

3 Adult Scholarships
Keith Kingsbury
Brent Strange
Rebecca Janis

3 Vet/Military Scholarships
Samantha Ohlsen
Justin Smith
Everett Hansen

3 1st Responder Scholarships
Casey Simmons
Joe Walsh
Matthew Garland

22 Guild Member Funded Scholarships – These winners were selected by a committee of current Guild members

Jack Skinkle
Samuel Colchamiro
Drayton Garbade
Caleb Fortwangler
Joe Lerner
Troy Schulte
Alejandro Vidal
Andrea Padgett
Jennifer Greenman
Jayce Terry
Gary Kazee
Guillermo Contreras
Jeremy Hintz
Matthew Foster
Ryan Werner
Howard Smith
Jonathan Robbins
Paul LeBarton
Stephen Tatar
John R. Dolan II
Matt Humphries
Joseph Quimby

Thank you again to the individual donors that help provide additional scholarships this year: Kevin Brodbeck, Kurt Allen, Scott Morris, Teresa Ozoa, Joe Romanowski, Peter Perrello, Todd Clippinger, Andy Chidwick, Joseph Lapolito, Gregg Cromeans, Terry Bollenbaugh, Charles Kilpatrick, Richard Moore, Alan Lillich, Don Trust, Scott Reichinger, John Hankins, Gregg Cromeans, Spencer Adams, and Anonymous.  To add your name (you can also donate anonymously) head over to the Guild  :)

The post 2021 Guild Scholarship Recipients appeared first on The Wood Whisperer.


from The Wood Whisperer https://ift.tt/3ErGiWn
via IFTTT

Things NOT To Do With Routers

You would be hard-pressed to find a tool that’s more versatile than a router. And it’s that versatility that requires us to understand exactly how the router (and bits) work in order to keep things safe. The setup and accessories can change so often that you can quickly find yourself doing something unfamiliar and potentially dangerous. So here is a short list of things not to do with routers:

  • Don’t Go the Wrong Way – It’s important to understand the direction the router should travel with respect to the work.
  • Don’t Disregard Speed – Make sure you run the router at the speed that’s appropriate for the bit and learn to control the speed of your hands as you move across the work.
  • Don’t Forget Your Support Pin – Router table lifts usually come with a support pin that can go a long way in supporting workpieces on bearing-guided operations.
  • Don’t Bottom Out Your Bits – Don’t push your bits all the way to the bottom of the collect.
  • Don’t Over-tighten Your Collet – Most good quality collect should not need to be muscled into submission just to grip a bit.
  • Don’t Take Too Deep of a Cut – Taking off too much material at once will cause excessive chatter and put a lot of stress on the bit.
  • Don’t Route Narrow Edges – Routers are big and top-heavy, so don’t try to use them on narrow edges without additional support.
  • Don’t Ignore the Sounds – Being able to hear the sounds your router makes during a cut can tell you a lot about what’s happening.

The post Things NOT To Do With Routers appeared first on The Wood Whisperer.


from The Wood Whisperer https://ift.tt/3nPW6w2
via IFTTT

Sunday, September 12, 2021

End Grain Glue Myths | You May Have Misunderstood

Recently, Patrick Sullivan released a video on End Grain Glue Myths and within a few days my inbox was swarmed with people asking for my opinion. I normally don’t provide public commentary on other peoples’ content but after having numerous conversations about the results of Patrick’s test and reading countless comments from people expressing that they no longer need to worry about interlocking wood joinery, I felt compelled to express my opinion. Let me be clear in that I do not disagree with anything in Patrick’s video. He did an excellent job and I can’t wait to see his future tests. I found his approach refreshingly scientific and I found his explanations enlightening.

The 2009 joint test article I referenced is from Fine Woodworking #203.

My hope is that this explanation prevents folks from assuming they can now assemble all of their furniture with glued butt joints only.

The post End Grain Glue Myths | You May Have Misunderstood appeared first on The Wood Whisperer.


from The Wood Whisperer https://ift.tt/393Vri1
via IFTTT

Friday, September 10, 2021

Can’t See the Line? | Marking on Dark Wood

Making visible lines on dark woods can certainly be a challenge. If you have good lighting and good eyes, you might be able to get away with your favorite standard pencils. But most people would benefit from a marking line that can be seen more clearly. Over the years I’ve tried a bunch of products and in this video I show you some of the pencils in my collection so you can see how they work and decide which one might be most appropriate for your work.

The post Can’t See the Line? | Marking on Dark Wood appeared first on The Wood Whisperer.


from The Wood Whisperer https://ift.tt/3E73Dwv
via IFTTT

Friday, September 3, 2021

Just Let the Trolls Flow

Show notes coming soon.

The post Just Let the Trolls Flow appeared first on The Wood Whisperer.


from The Wood Whisperer https://ift.tt/3n1kASF
via IFTTT

Cheap Effective Chisel Sharpening | Scary Sharp!

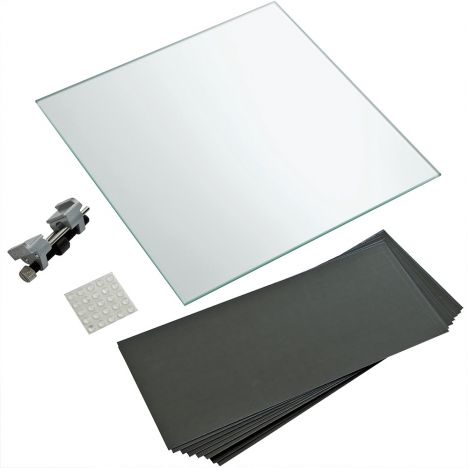
Sharpening can be daunting because of the number of methods, materials, and gadgets available that will get the job done. And sharpening is one of those things that you can put as much time and money into it as you want if you’re not afraid of diminishing returns. I made this video to show you that you don’t HAVE to go nuts with a sharpening setup. With a piece of glass, two grits of wet-dry paper, and a honing guide (optional), you can get a perfectly serviceable chisel.

Rockler sells a simple kit to get you’re started if you think the sandpaper method is right for you: Get Your Scary Sharp Kit Here

The post Cheap Effective Chisel Sharpening | Scary Sharp! appeared first on The Wood Whisperer.


from The Wood Whisperer https://ift.tt/3zL2c3Y
via IFTTT

Friday, August 27, 2021

I Made My Own Plantation Shutters | Saved a BUNCH of $$$

In our master bedroom, we have a very large eyebrow window above a sliding glass door. It’s absolutely beautiful but it also lets in a ton of light at sunrise. While I personally enjoy a face full of sunshine as a wakeup call, Nicole needs more sleep than I do. We already put a dark film on the windows to help tone down the light but the effect was pretty minimal. So I decided to make my own plantation shutters. Having purchased shutters in the past, I know that this custom work would probably have cost me well into the thousands of dollars. After a little Googling, I discovered that Rockler not only has a helpful Wizard to help you design your shutters, but also a bunch of jigs and supplies you’d need to make them. Although I had to make some custom changes to accommodate a curved top, Rockler’s plan and supplies made this project fairly simple. That’s why I approached them to sponsor this episode. Big thanks to Rockler for not only sponsoring the show but also having the resources I needed to get the job done.

The post I Made My Own Plantation Shutters | Saved a BUNCH of $$$ appeared first on The Wood Whisperer.


from The Wood Whisperer https://ift.tt/3yxIjwd
via IFTTT

Friday, August 20, 2021

I’m a Justifiable Tool

Show notes coming soon.

The post I’m a Justifiable Tool appeared first on The Wood Whisperer.


from The Wood Whisperer https://ift.tt/3gg83Xx
via IFTTT

But This Not That | Measuring & Marking

Our previous Buy This Not That video about drill bits went over pretty well and many folks asked me to do another one. So I gave it some thought and came up with a list of measuring and marking devices that I think you should buy as well as the ones I think you should avoid. Let’s jump in!

Tape Measures

Many of us buy 16′ or 25′ tape measures simply because that’s what we think we need. But in reality, most woodworking project parts can be measured at 6′ and under. So my recommendation is to save a few bucks and purchase 12′ or 6′ tape measures instead. They’re nice and compact and you can spend the savings on additional tape measures that you can spread around the shop. Of course you’ll probably still want at least one long tape measure for DIY projects and whenever a shop project calls for it, but I think you’re best served by stocking up on the shorter variety.

Squares

The premium squares from the likes of Woodpeckers and Bridge City Toolworks are gorgeous examples of craftsmanship in tooling, but they’re completely unnecessary. When you’re first starting out, you’ll be far better served by a set of machinist squares instead. They’re more durable, often more accurate, and much cheaper. Full disclosure, I own and adore my Bridge City and Woodpeckers squares, but they’re what I consider luxury items.

Rulers

You may think you need a ruler in the shop and larger rules can certainly come in handy. But if you’re in the market for a 12″ ruler I recommend instead investing in a decent 12″ adjustable square. Most rulers have marks that start about 1/8″ from the end so they’re much less useful. A square, on the other hand, not only functions as a quality rule but also as a square and marking device.

Angles

You’ll get a lot more use out of a bevel gauge and a protractor than tools with dedicated static angles. A static angle obviously means it can only do one thing, but a bevel gauge allows you to lock in any angle you could possibly need.

Pencils

If you’re new to woodworking you might head to the hardware store and see those wacky flat pencils and assume you need one. Well, you don’t. In my opinion, the best pencil for the shop is a .5mm Mechanical Pencil. Mechanical pencils have consistent line thickness at all times and can also be used with various marking devices that feature holes for a .5mm lead.

Marking Knives

I recommend avoiding double bevel marking knives and instead opting for a single bevel marking knife. With a single bevel, the back of the knife is dead flat and can be pressed against a reference surface for accurate marking whereas a double bevel has a tendency to push the cut line further away from the reference. Double bevel knifes also tend to make a wider cut line as the bevel cuts/crushes fibers on both sides of the center point.

Marking (Cutting) Gauges

Marking gauges usually come with one of three cutters: a blade, a wheel, or a sharp point. I recommend avoiding the sharp point variety as they tend to tear out the grain and generally don’t produce as fine of a line.

The post But This Not That | Measuring & Marking appeared first on The Wood Whisperer.


from The Wood Whisperer https://ift.tt/3D7iwy2
via IFTTT

40% off a Project at the TWW Guild!

It’s a TWW Guild Sale until Aug 31st! ! 40% OFF a single project* until Aug 31st. Use the code BOWTIE at checkout.
*Excludes the projects that have been released in the past year: Quilt Rack, Japanese End Table, and Morley Lounge Chair
Not familiar with our online woodworking school? You can find more information here.

The post 40% off a Project at the TWW Guild! appeared first on The Wood Whisperer.


from The Wood Whisperer https://ift.tt/3AXZWGR
via IFTTT

Friday, August 13, 2021

Space-Saving Plywood Cart | Swings Out!

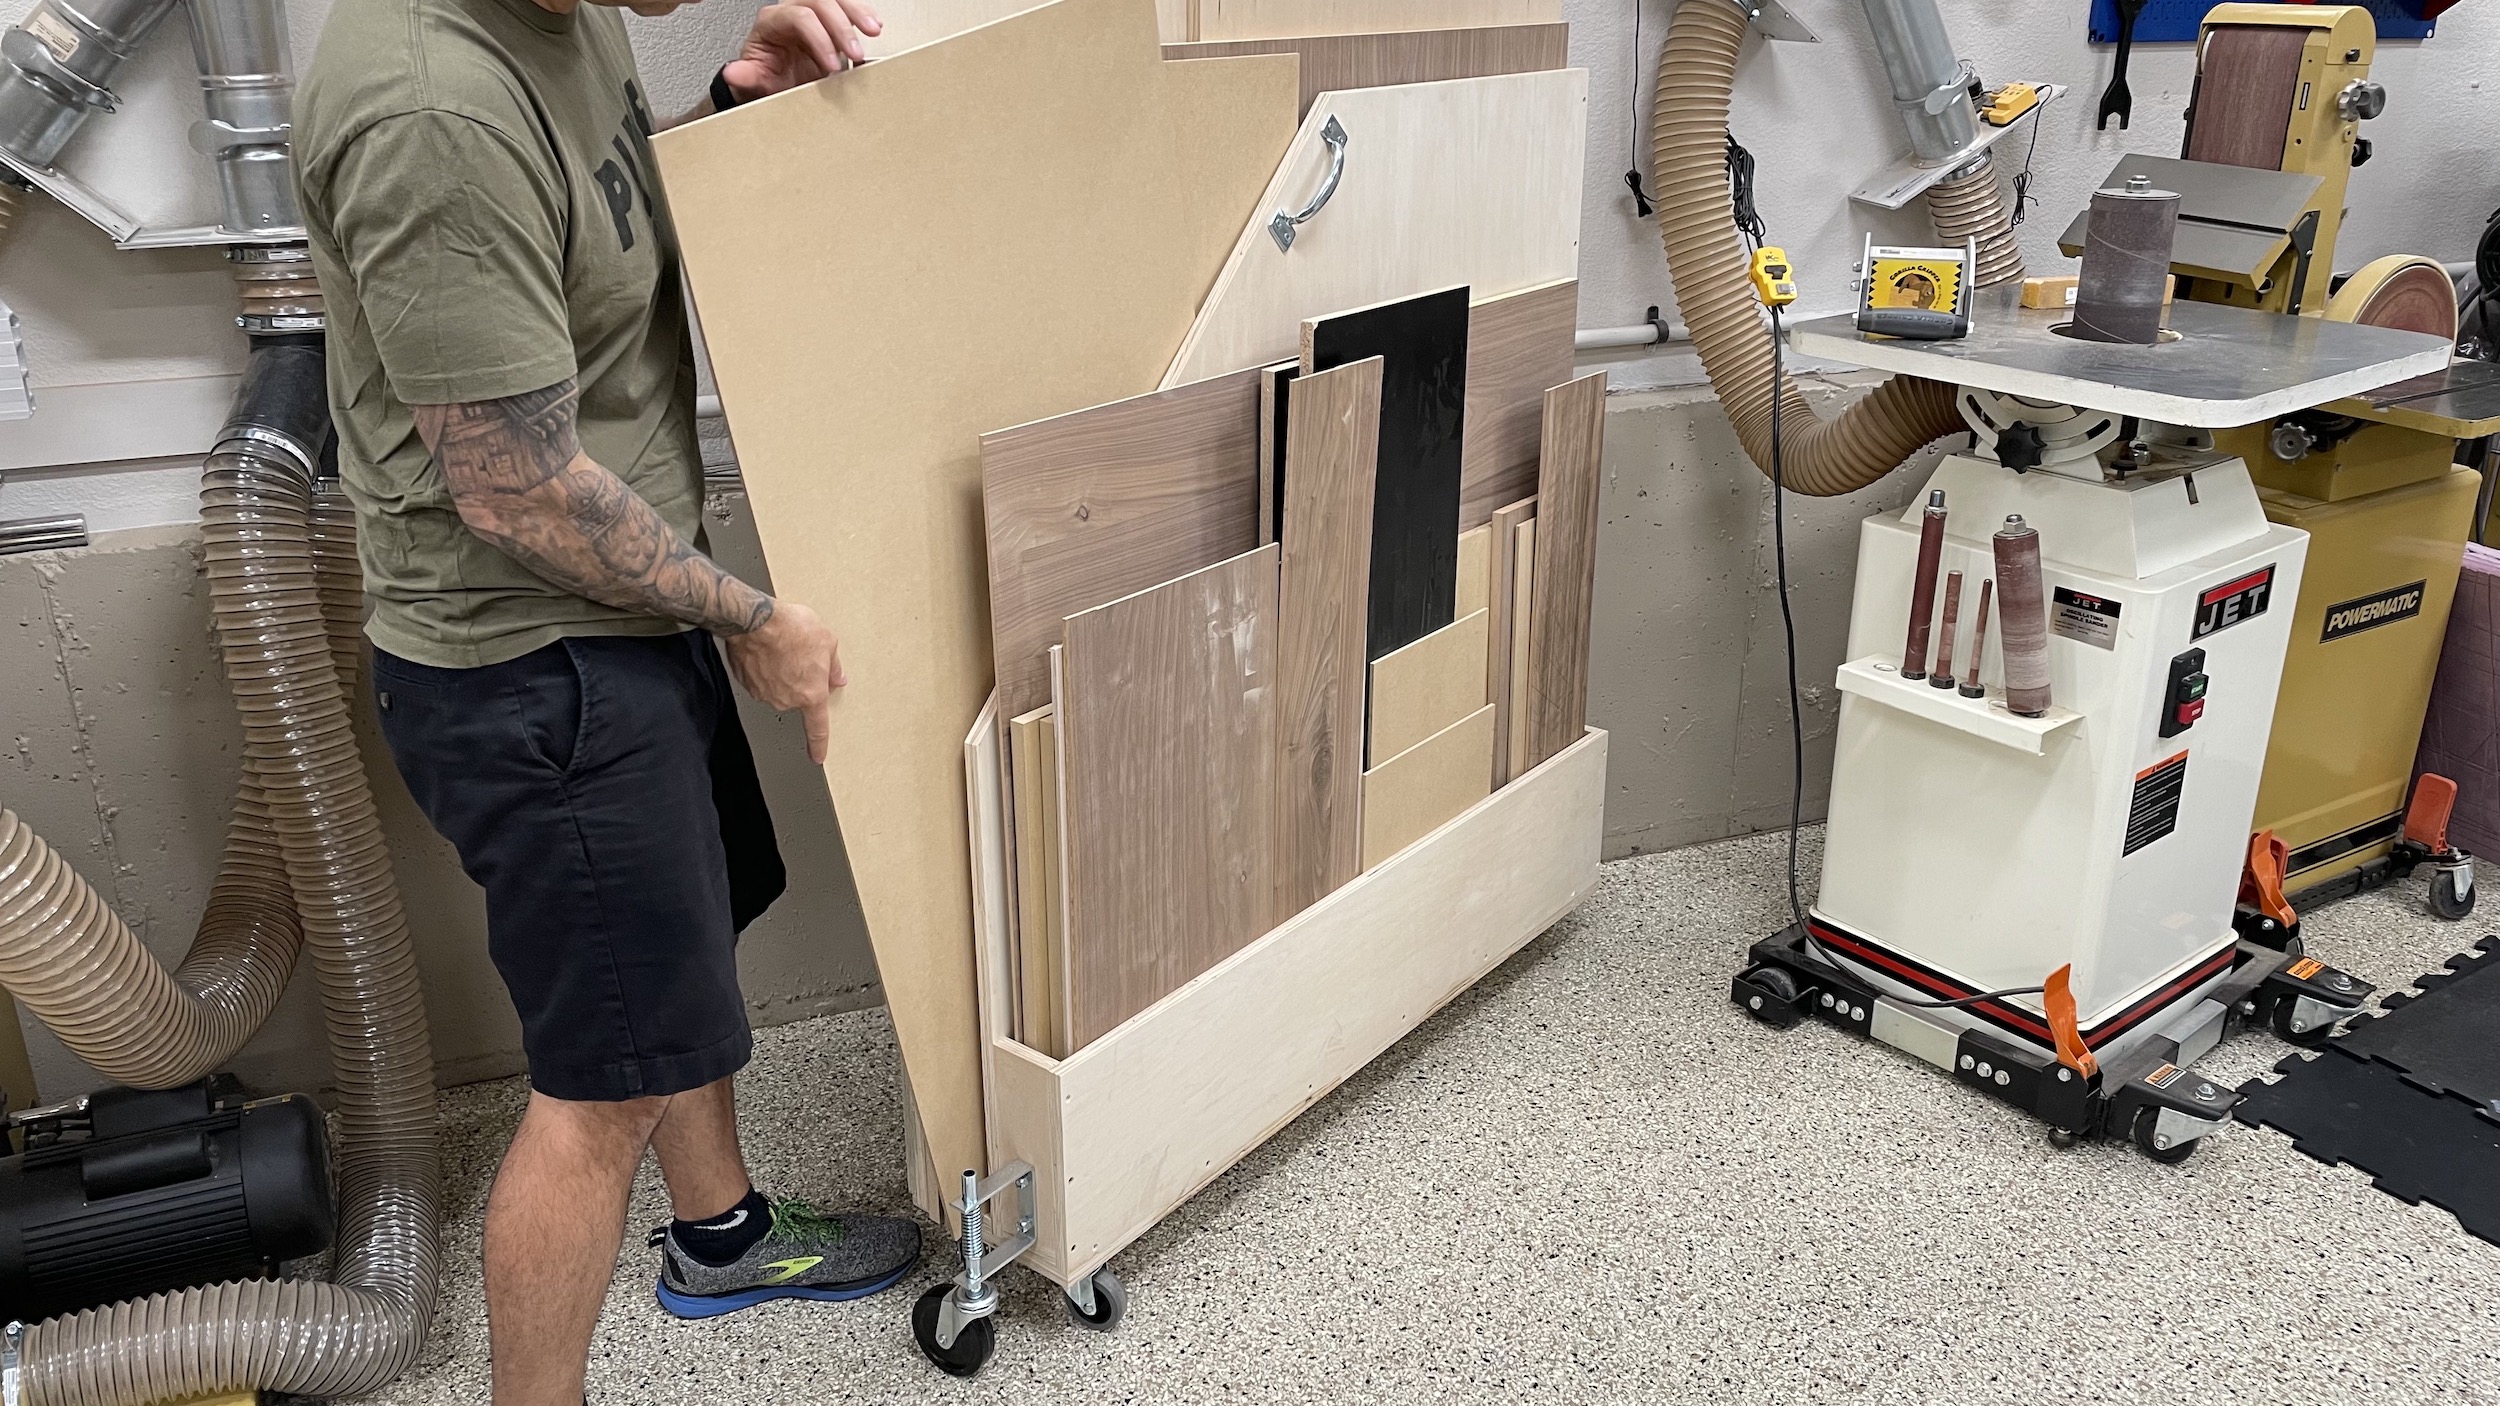
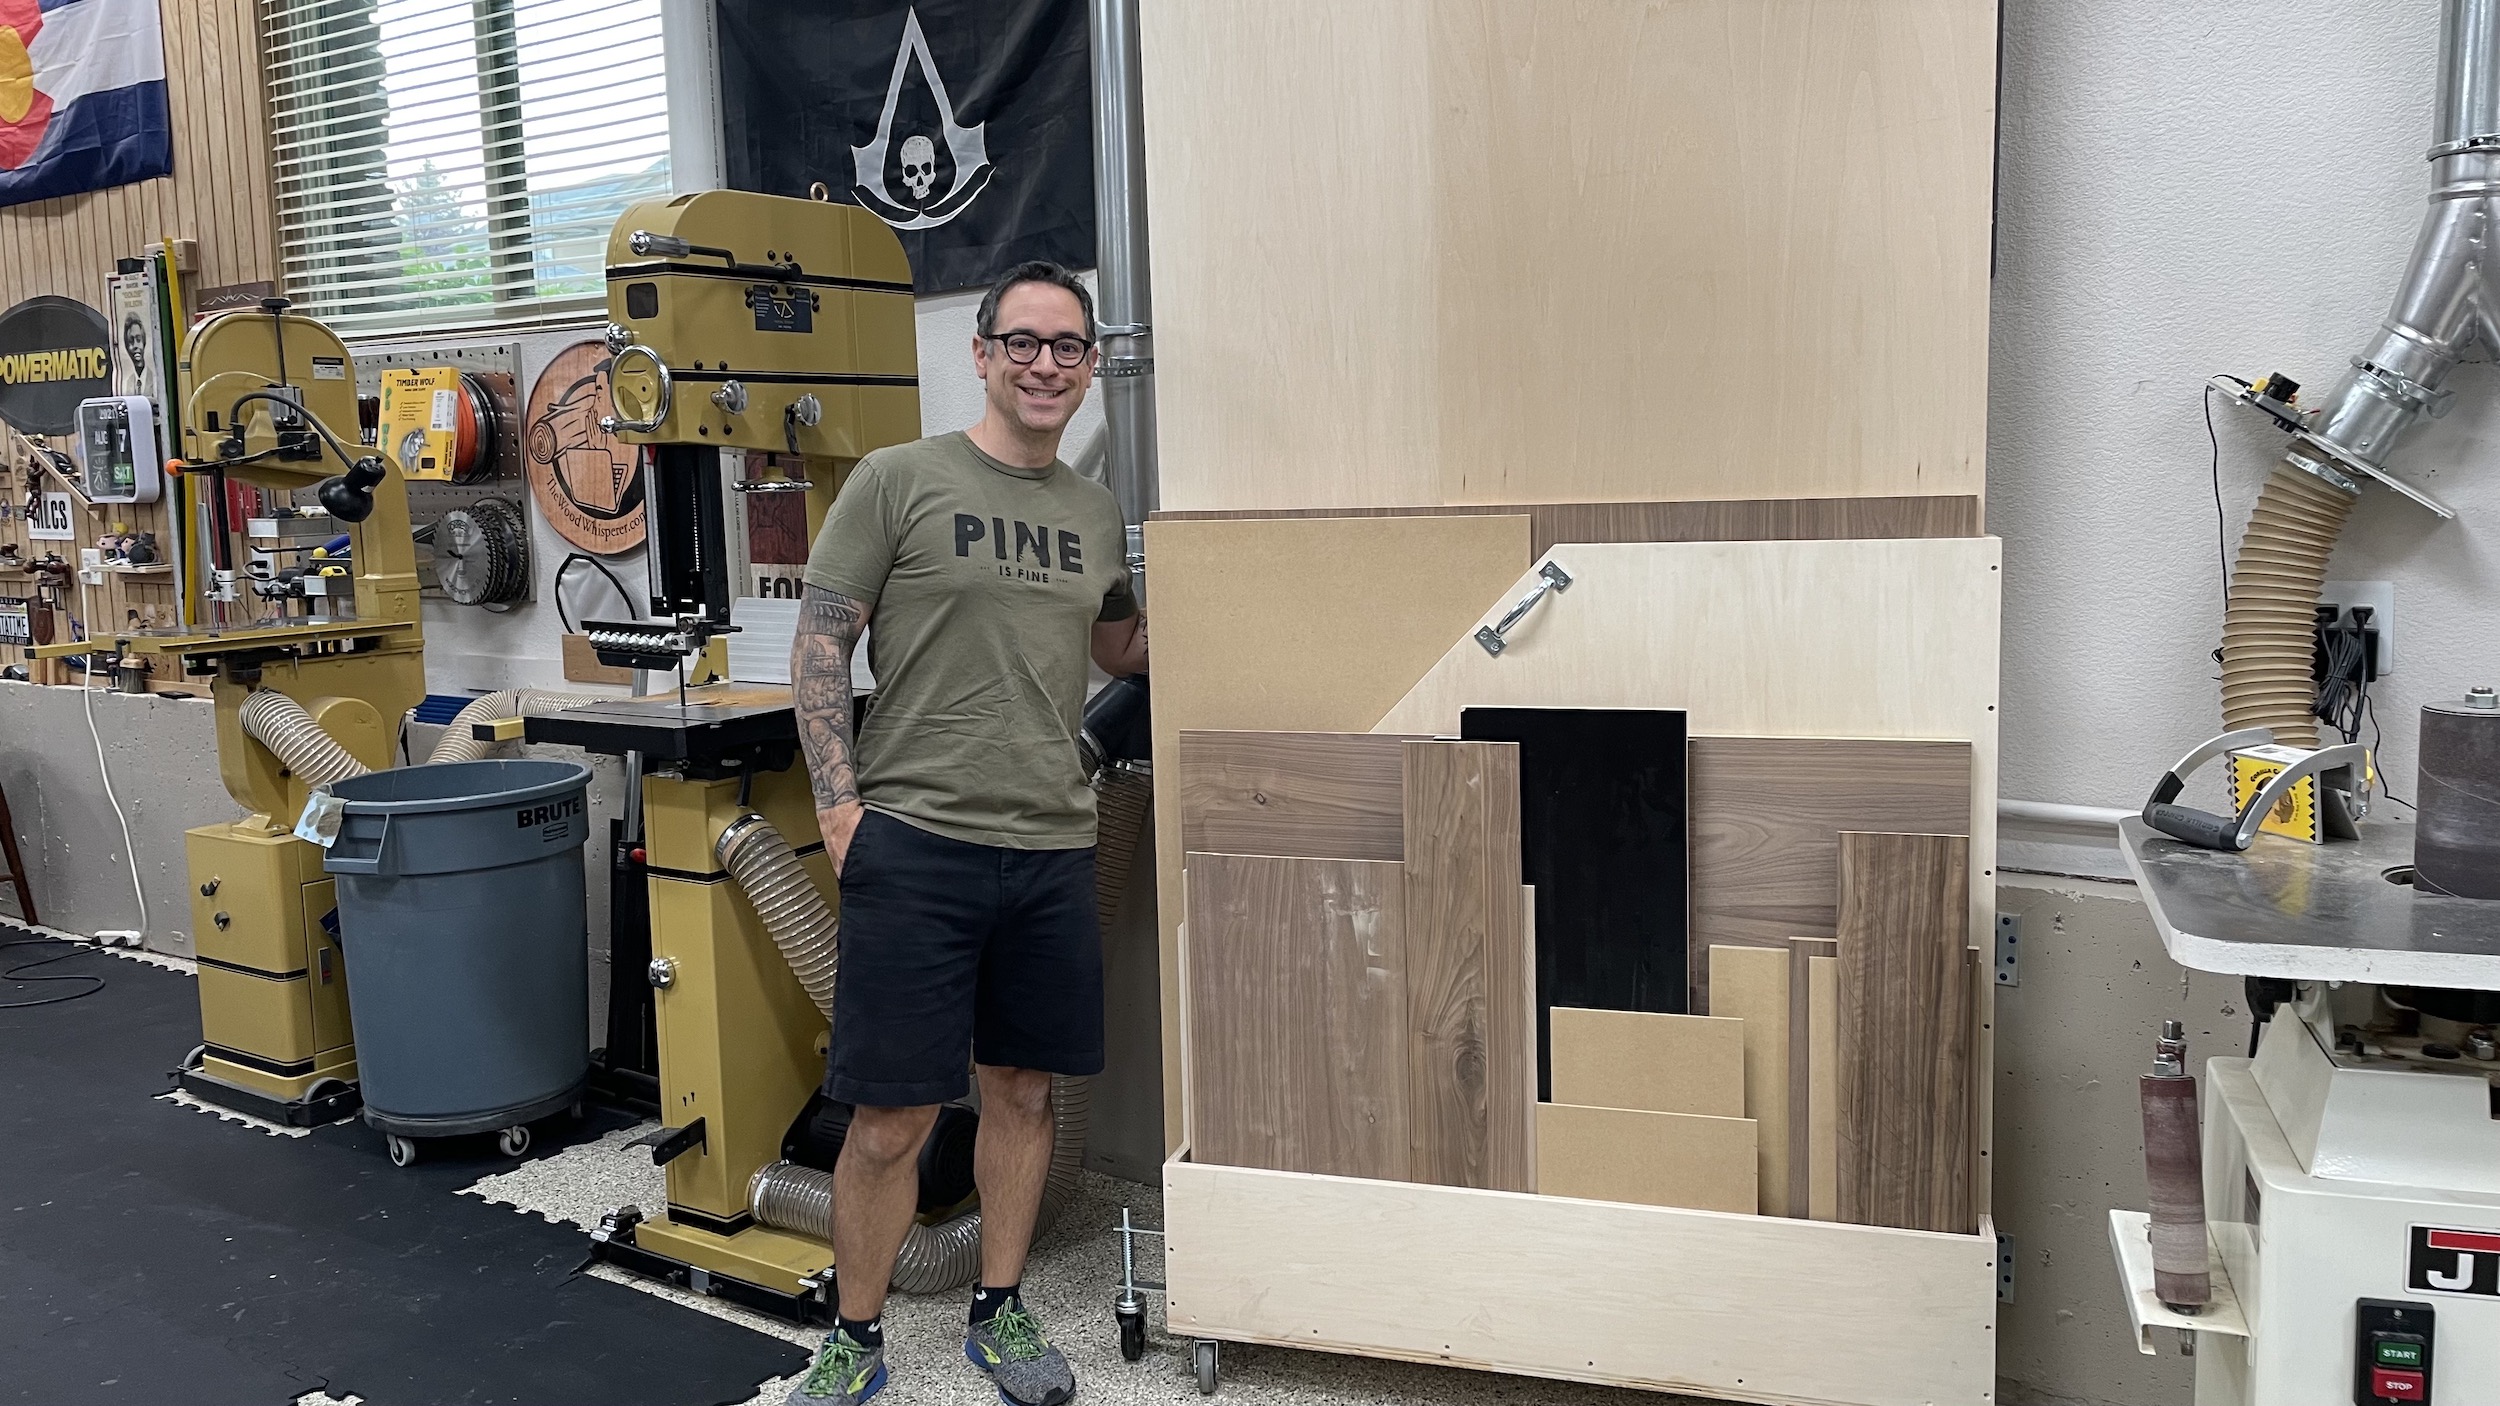
When I first moved to Arizona, I was fortunate to have a huge garage with an RV pull-through. As a result, wall space was not an issue and my plywood storage consisted of a swing-out rack near the front door. Check out the original cart. Here in Denver, my shop space is much more limited and to date I simply leaned all of my sheet goods against the wall between two power tools. This turned out to be incredibly inefficient because every time we need something at the back of the stack, we have to move EVERYTHING out of the way first. Thankfully, my assistant Jon made a great suggestion: a swing-out rack. While we certainly don’t have the space for a horizontal swing-out rack, we could definitely make a vertical work in this space. So that’s what we have here is a simple plan for a plywood rack that can hold full sheets and scraps while being able to hinge away from the wall for loading and unloading.

Things You’ll Need

  • Gate Hinges – https://amzn.to/2VArbIL
  • Casters – https://amzn.to/2VHu0aQ  (This is a 4-pack but you really only need two)
  • Spring-Loaded Gate Caster – https://amzn.to/3iCOSbK

The Plans

If you want to build this Space-Saving Swing-Out Plywood Cart, you can purchase the plans here:

The post Space-Saving Plywood Cart | Swings Out! appeared first on The Wood Whisperer.


from The Wood Whisperer https://ift.tt/2VSV7Qj
via IFTTT

Friday, August 6, 2021

Man Girdles & Steel Balls

Show notes coming soon.

The post Man Girdles & Steel Balls appeared first on The Wood Whisperer.


from The Wood Whisperer https://ift.tt/3rX8hYe
via IFTTT

Tricking Out a Cheap Desk | Was it Worth it?!

We’ve all been there. A family member or friend needs a piece of furniture but you just don’t have time to build it, so they buy something instead. When my mom moved to Denver that’s exactly what happened. She needed a desk so she could start working and Nicole knew I wouldn’t be able to build one any time soon, so she purchased a desk and hutch for about $342. While the desk certainly has its issues, it’s really hard to complain at that price. Truth be told, my mom only made one request and that was to improve the drawer capacity. Of course that one change led me to think of other ways we might improve the desk to make it more functional.

The changes I made include building new drawer boxes, installing full-sized slides, building adjustable shelves, installing power grommets, raising a shelf, raising the keyboard tray, and adding an LED strip.

Here are some links to products shown in the video:

The post Tricking Out a Cheap Desk | Was it Worth it?! appeared first on The Wood Whisperer.


from The Wood Whisperer https://ift.tt/3ClkdI3
via IFTTT

Monday, August 2, 2021

Own a piece of Wood Whisperer History!

This giveaway will run until Aug 31st, 2021. For more details and our giveaway FAQ head over to the Giveaway page

TWW & Powermatic C-Table Giveaway

The post Own a piece of Wood Whisperer History! appeared first on The Wood Whisperer.


from The Wood Whisperer https://ift.tt/3ijuMTP
via IFTTT

Saturday, July 31, 2021

Pop the Bubble!

Show notes coming soon.

The post Pop the Bubble! appeared first on The Wood Whisperer.


from The Wood Whisperer https://ift.tt/3lhhIQN
via IFTTT

Friday, July 30, 2021

Denver Skyline Daybed | Converts to King

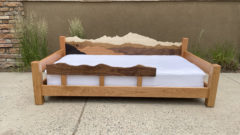
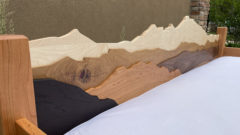
As you might recall, my assistant Jon has some cool design ideas such as the Artsy Fan C-Table we made last year. His next idea was for a daybed featuring a stylized Denver skyline headboard. Since the bed is for his young daughter, one of the design priorities was to make sure the headboard could be re-used in the future for a larger king-size bed, and we were able to accomplish that.

The primary joinery for the bed is Dominos along with Domino DF500 Knock-Down Hardware.

The finish we used was Walrus Oil. Jon wanted a finish that was easy to apply, easy to repair, and most importantly safe for his daughter. It’s hard to think of a finish that fits that description better than Walrus Oil. Walrus Oil has a wide range of products but the one we used was their Furniture Butter. It’s made from plant-based polymerized oils and hard waxes and applies with nothing more than a rag.

If you’d like to try some Walrus Oil products for yourself you can use the coupon code Marc at checkout for 20% OFF until August 31st.

The post Denver Skyline Daybed | Converts to King appeared first on The Wood Whisperer.


from The Wood Whisperer https://ift.tt/376KXh7
via IFTTT

Friday, July 23, 2021

Hang On, I’m Making a Thumbnail | TWW Live

00:00:42 – Welcome back to the Wood Whisperer Live Show
00:01:03 – Thank you to all who watch!
00:01:48 – Thank you to our Patreon and YouTube members!
00:02:35 – New video Friday!
00:06:20 – New mugs are in stock!
00:07:35 – Guild scholarship announcement
00:08:34 – Sign up for the Wood Whisperer newsletter
00:09:20 – Powermatic sweepstakes!
00:10:09 – How can I secure something like [picture] to the wall?
00:12:25 – What is the dinosaur comic in the background?
00:13:19 – Will this cutting board [picture included] explode with movement?
00:16:40 – Can you make your own furniture finish sous-vide style?
00:19:43 – Can I put a film finish over a waxed surface?
00:21:30 – Can you darken cherry plywood?
00:24:53 – Can you list estimated project time completion on guild projects?
00:26:22 – What’s the BAN hammer?
00:27:07 – Are square or round dog holes better?
00:28:28 – Do you have any recommendations for a drum sander?
00:30:17 – How can I fix turned, laminated legs that are splitting?
00:33:09 – How long can you leave finish in a spray gun before it’s an issue?
00:34:40 – Are you ever going to produce CNC content?
00:36:36 – Where do you buy your screws?
00:37:30 – Are guild projects good for brand new woodworkers?
00:40:00 – Are there any new techniques or tools that you’re excited about?
00:41:54 – Any strategies for complicated glue-ups?
00:43:30 – Do you ever get analysis paralysis at certain points of projects?
00:45:03 – How can you use the whole bottle of CA glue?
00:46:25 – How can I keep my brick-sided shop cooler?
00:47:37 – Can I add water if my Titebond III is starting to get thick?
00:48:13 – What do you do for your shop lighting?
00:52:17 – Why do I get a white spot when I put a hot plate on it?
00:57:10 – Mug giveaway! Congratulations!

The post Hang On, I’m Making a Thumbnail | TWW Live appeared first on The Wood Whisperer.


from The Wood Whisperer https://ift.tt/3eSPvvF
via IFTTT

CA Glue – The Woodworking Problem Solver

CA (cyanoacrylate) glue is a handy thing to have in the shop. It dries fast, comes in several viscosities, and can solve a lot of problems for the woodworker. Oddly enough, the thing I use CA glue for the least is gluing together joinery, mostly because a traditional wood glue is easier to use, works better, is safer and is less expensive. But it’s still worth having a bottle or two around the shop.

Relevant Links

Here are just a few of the things you can do with CA Glue and the viscosities I recommend. I’ll spoil the ending: I think you’re best off buying two: Medium and either Thick or Gel

  • Small Finger Joints (Thin CA) – Let’s say you’ve made a small decorative box or some other light-duty project and you have a bunch of finger joints to glue up. It’s kind of a pain to apply wood glue to all of those little fingers so an alternative option is to assemble the joints dry, then apply THIN Ca Glue over the joint, letting the glue soak into the wood and the space between the fingers.
  • Firming Up Soft Wood (Thin CA) – If you’re working woods like spalted maple, you might find some areas of your boards that are soft and easy to dent. CA glue can be used to firm up the fibers.
  • Tearout (Gel, Thick, Medium CA) – Tearout is a fact of life in the wood shop. Sometimes you can recover the torn out piece and you can glue it right back in place. Other times you might need to cut a patch out of scrap, but you can still attach it with CA glue.
  • Small Cracks and Joinery Gaps (Medium CA) – If you’re board has small hairline cracks or maybe your joinery is a little gappy, you can use a mixture of CA glue and sawdust to make a serviceable filler.
  • Knot Fills and Stabilization (Medium CA) – Small knots can be filled and stabilized using CA glue. Because it dries clear, the knot looks fairly natural as the dark color inside the knot shows through the CA glue layer.
  • Figured Wood Tearout (Thick CA) – Sometimes when planing heavily figured woods, you can end up with lots of little divots in the surface. If using a clear topcoat that dries to a film, you can pre-fill the tearout with CA glue, sand it smooth, and then topcoat with your finish.
  • Miter Clamp Blocks (Thick or Gel CA) – Using CA glue you can temporarily attach clamping blocks to a frame, as long as the clamp block is made from a wood that’s softer than the wood of the frame.
  • Dark Streaks and Knots (Dark CA Glue) – As an alternative to a clear CA glue, you can use a pigmented glue to create a darker fill.
  • Template Routing Double Stick Tape Alternative (Thick or Gel CA) – Using blue tape and CA glue, we can firmly attach templates to our workpieces without doing any damage.

The post CA Glue – The Woodworking Problem Solver appeared first on The Wood Whisperer.


from The Wood Whisperer https://ift.tt/3eQmOQ9
via IFTTT

Friday, July 16, 2021

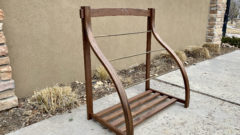
Not Your Grandma’s Quilt Rack | Bent Lamination

My wife Nicole loves blankets and quilts and we often have trouble finding places to store them. Many of the quilts were made by Nicole so they’re actually something we’d like to be on display. So I went on the hunt for a cool quilt rack design to use as a starting point and quickly came up empty. Most quilt racks are more traditional in their styling and I wanted to do something different. That’s when I remembered an older project made by my good buddy David Marks on Woodworks: the Contemporary Magazine Rack. I though David’s design, if cut in half, would be a really cooling looking and elegant way to store a few quilts. So big thanks to David for letting me riff on his design and I highly recommend you go over to David’s site and spend $5 on that particular episode of Woodworks.

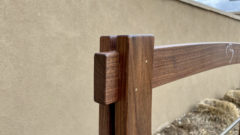
This is a fun and challenging project featuring bent lamination using a vacuum press, lots of mortise and tenon joinery, and modified half-lap joinery. If you’d like to see a more detailed presentation, we offer plans and a full video course on this project in the Wood Whisperer Guild.

And here are a few photos so you can see the Bent Lamination Quilt Rack in detail.

The post Not Your Grandma’s Quilt Rack | Bent Lamination appeared first on The Wood Whisperer.


from The Wood Whisperer https://ift.tt/3BciiET
via IFTTT

Friday, July 9, 2021

Save the Domino! – TWW Live

Show notes coming soon.

The post Save the Domino! – TWW Live appeared first on The Wood Whisperer.


from The Wood Whisperer https://ift.tt/36oXqfA
via IFTTT

Buy This, Not That | Drill Bits

Drill bits are not all created equal and some bits won’t even find their way onto your radar until you’re neck deep in the craft. If you’re new to woodworking, this video might save you some time, money, and frustration as I show you the bits you should buy and the ones you should avoid. Unfortunately, many bits that excel in the construction industry just won’t cut it for fine woodworking and that means you may not find the good stuff at the local hardware store. Let’s dig in!

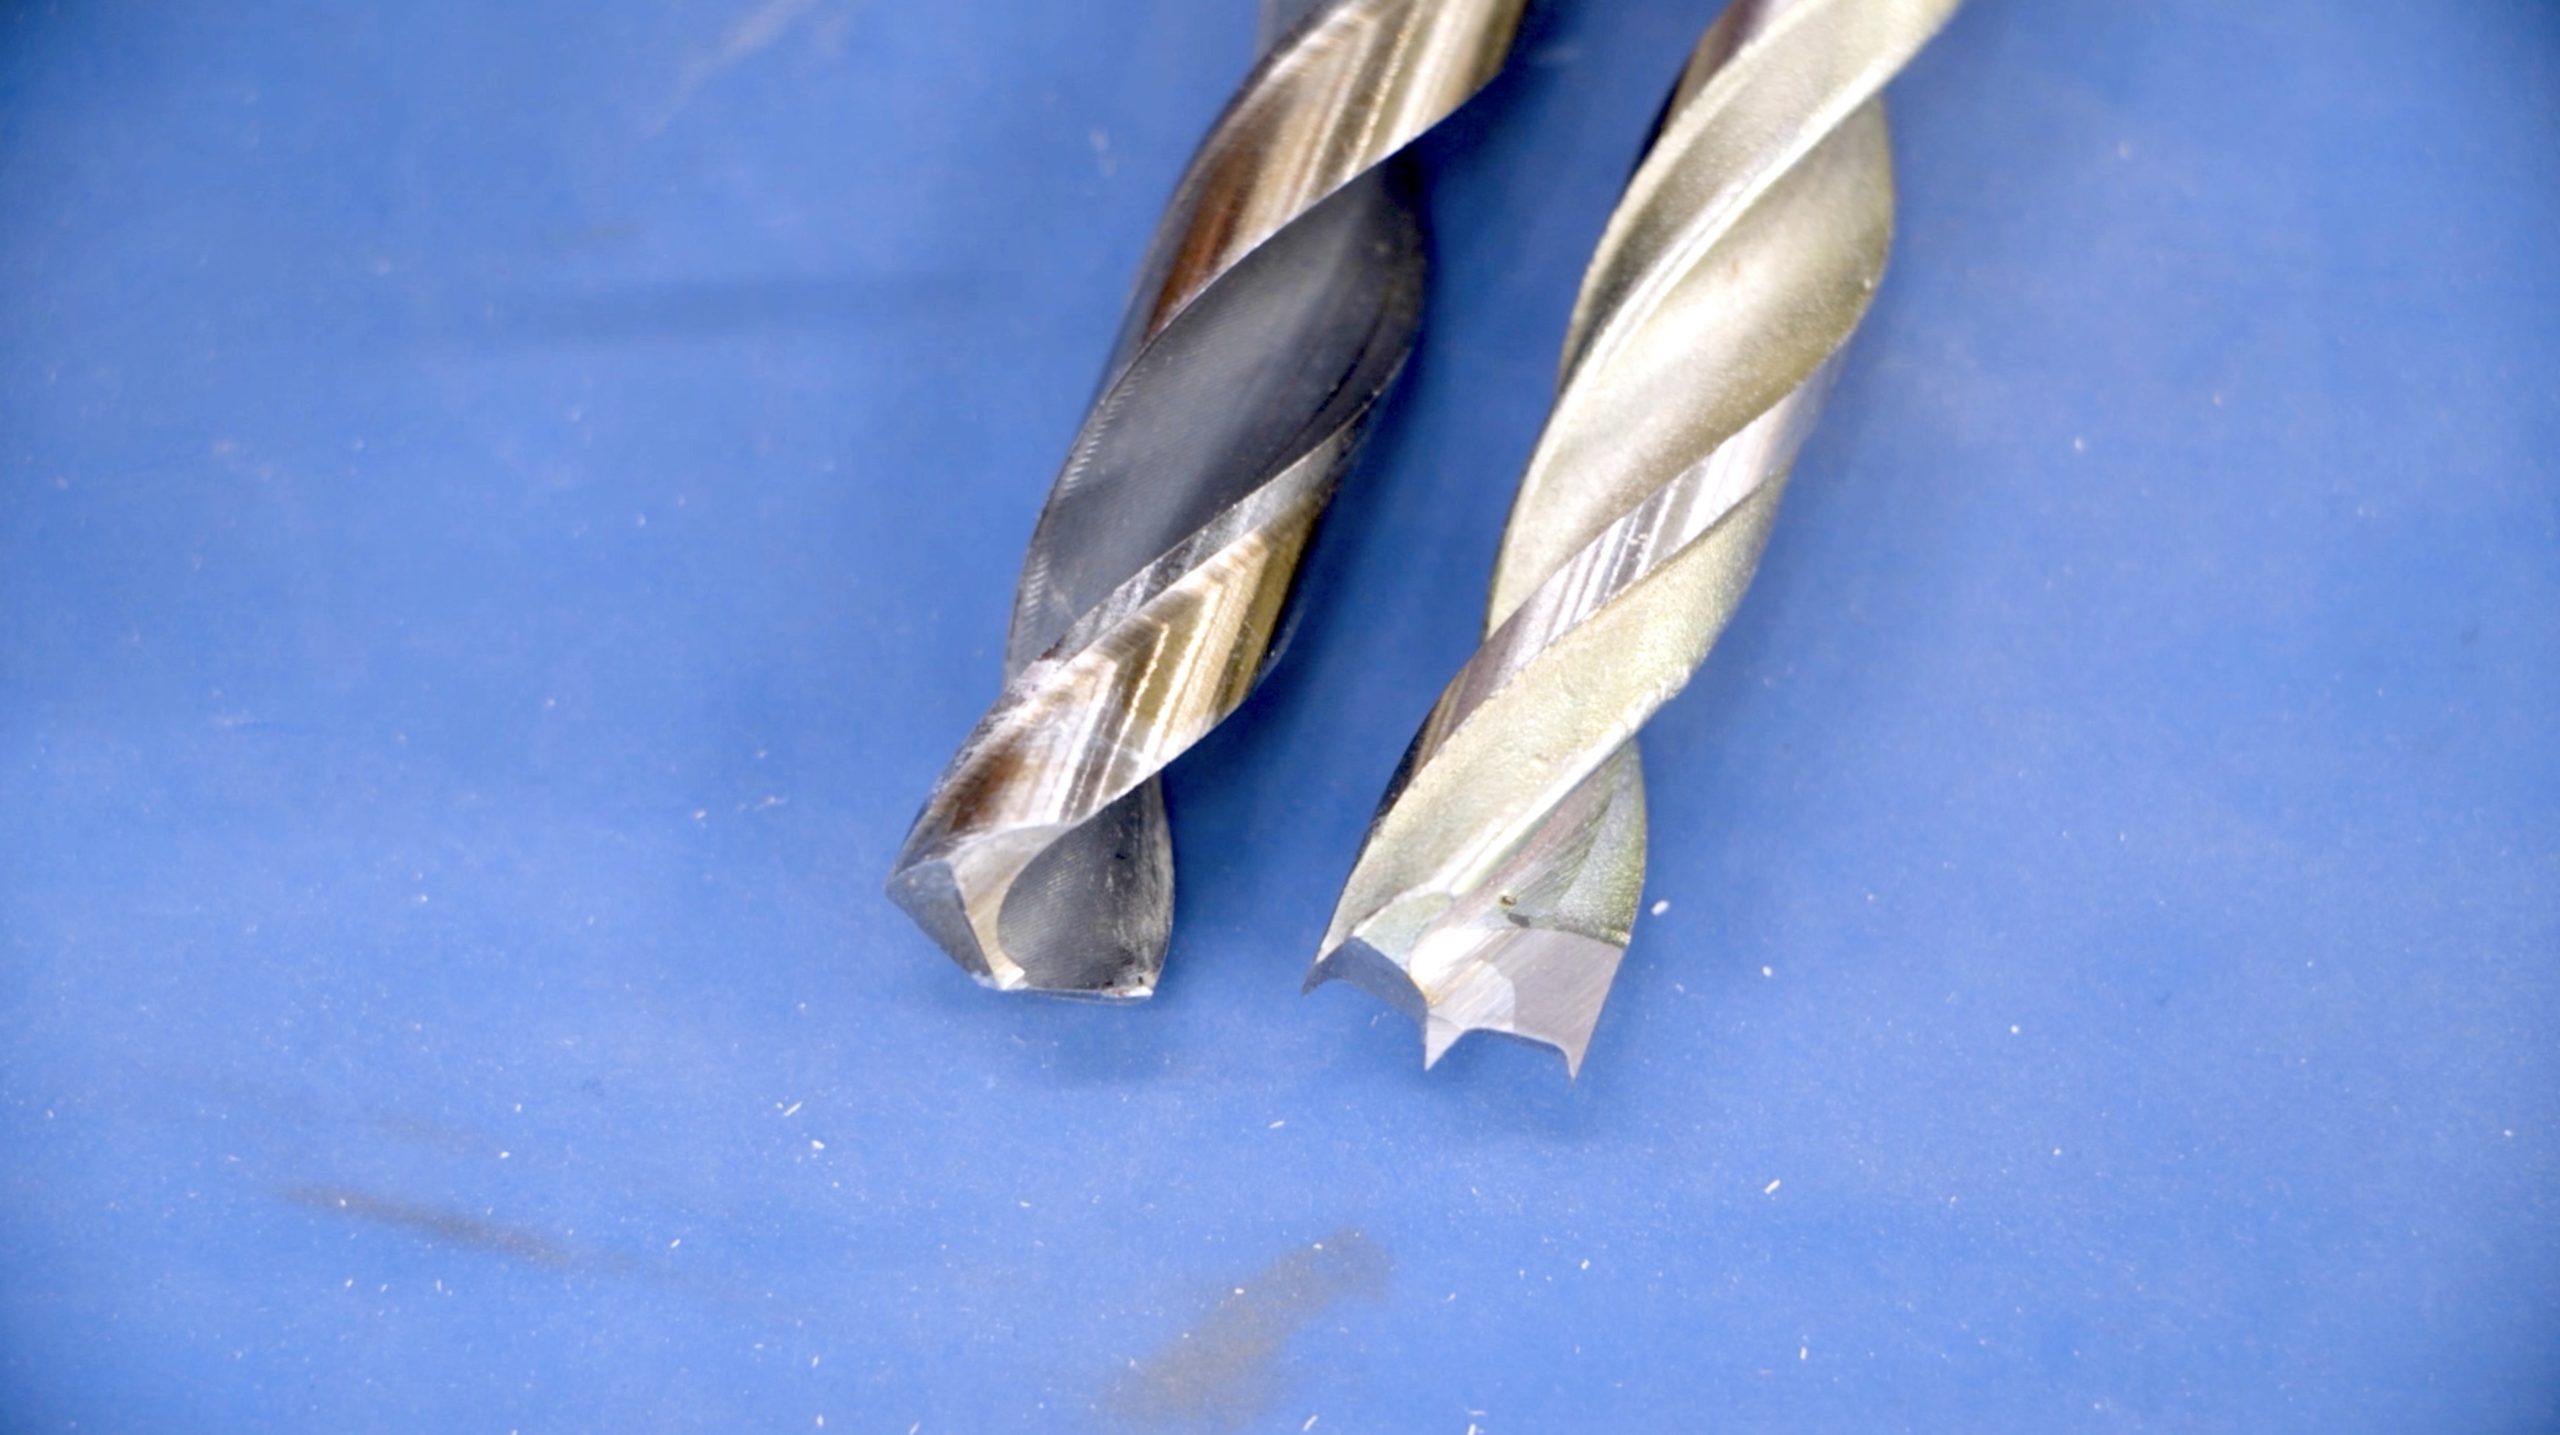
Twist Bits Vs Brad Point Bits

The standard twist bit is what most people think of when they hear the word “drill bit.” They feature a conical tip that can be tricky to locate accurately. They also have a tendency to cause tearout on the way it and on the way out of the material. Brad point bits are the much better choice for the fine woodworker. The spurs on the end of the bit are able to cut the wood fibers cleanly so the bit often has much less tearout. It’s still a good idea to have a Twist Bit set on hand for general use but when it comes to furniture projects, I’m using brad point bits.

Forstner Bits vs Spade Bits

Twist and brad point bits only get so large, so at a certain point you’ll need to turn to a different style bit to make bigger holes. In construction, the spade bit is often used because it’s aggressive and hogs through softwoods like my son on a plate of pizza rolls. But if you use a spade bit on hardwoods you’ll not only have a bunch of tearout and an ugly hole, you also might find the drill jumping and bucking like an angry bull. Thankfully there’s a better way: forstner bits. Forstner bits are capable of making very clean holes with zero tearout and a nice flat bottom. I use them quite often for making counterbores and small recesses for hardware. There’s very little reason for a woodworker to have spade bits in their tool box.

Countersink Bits

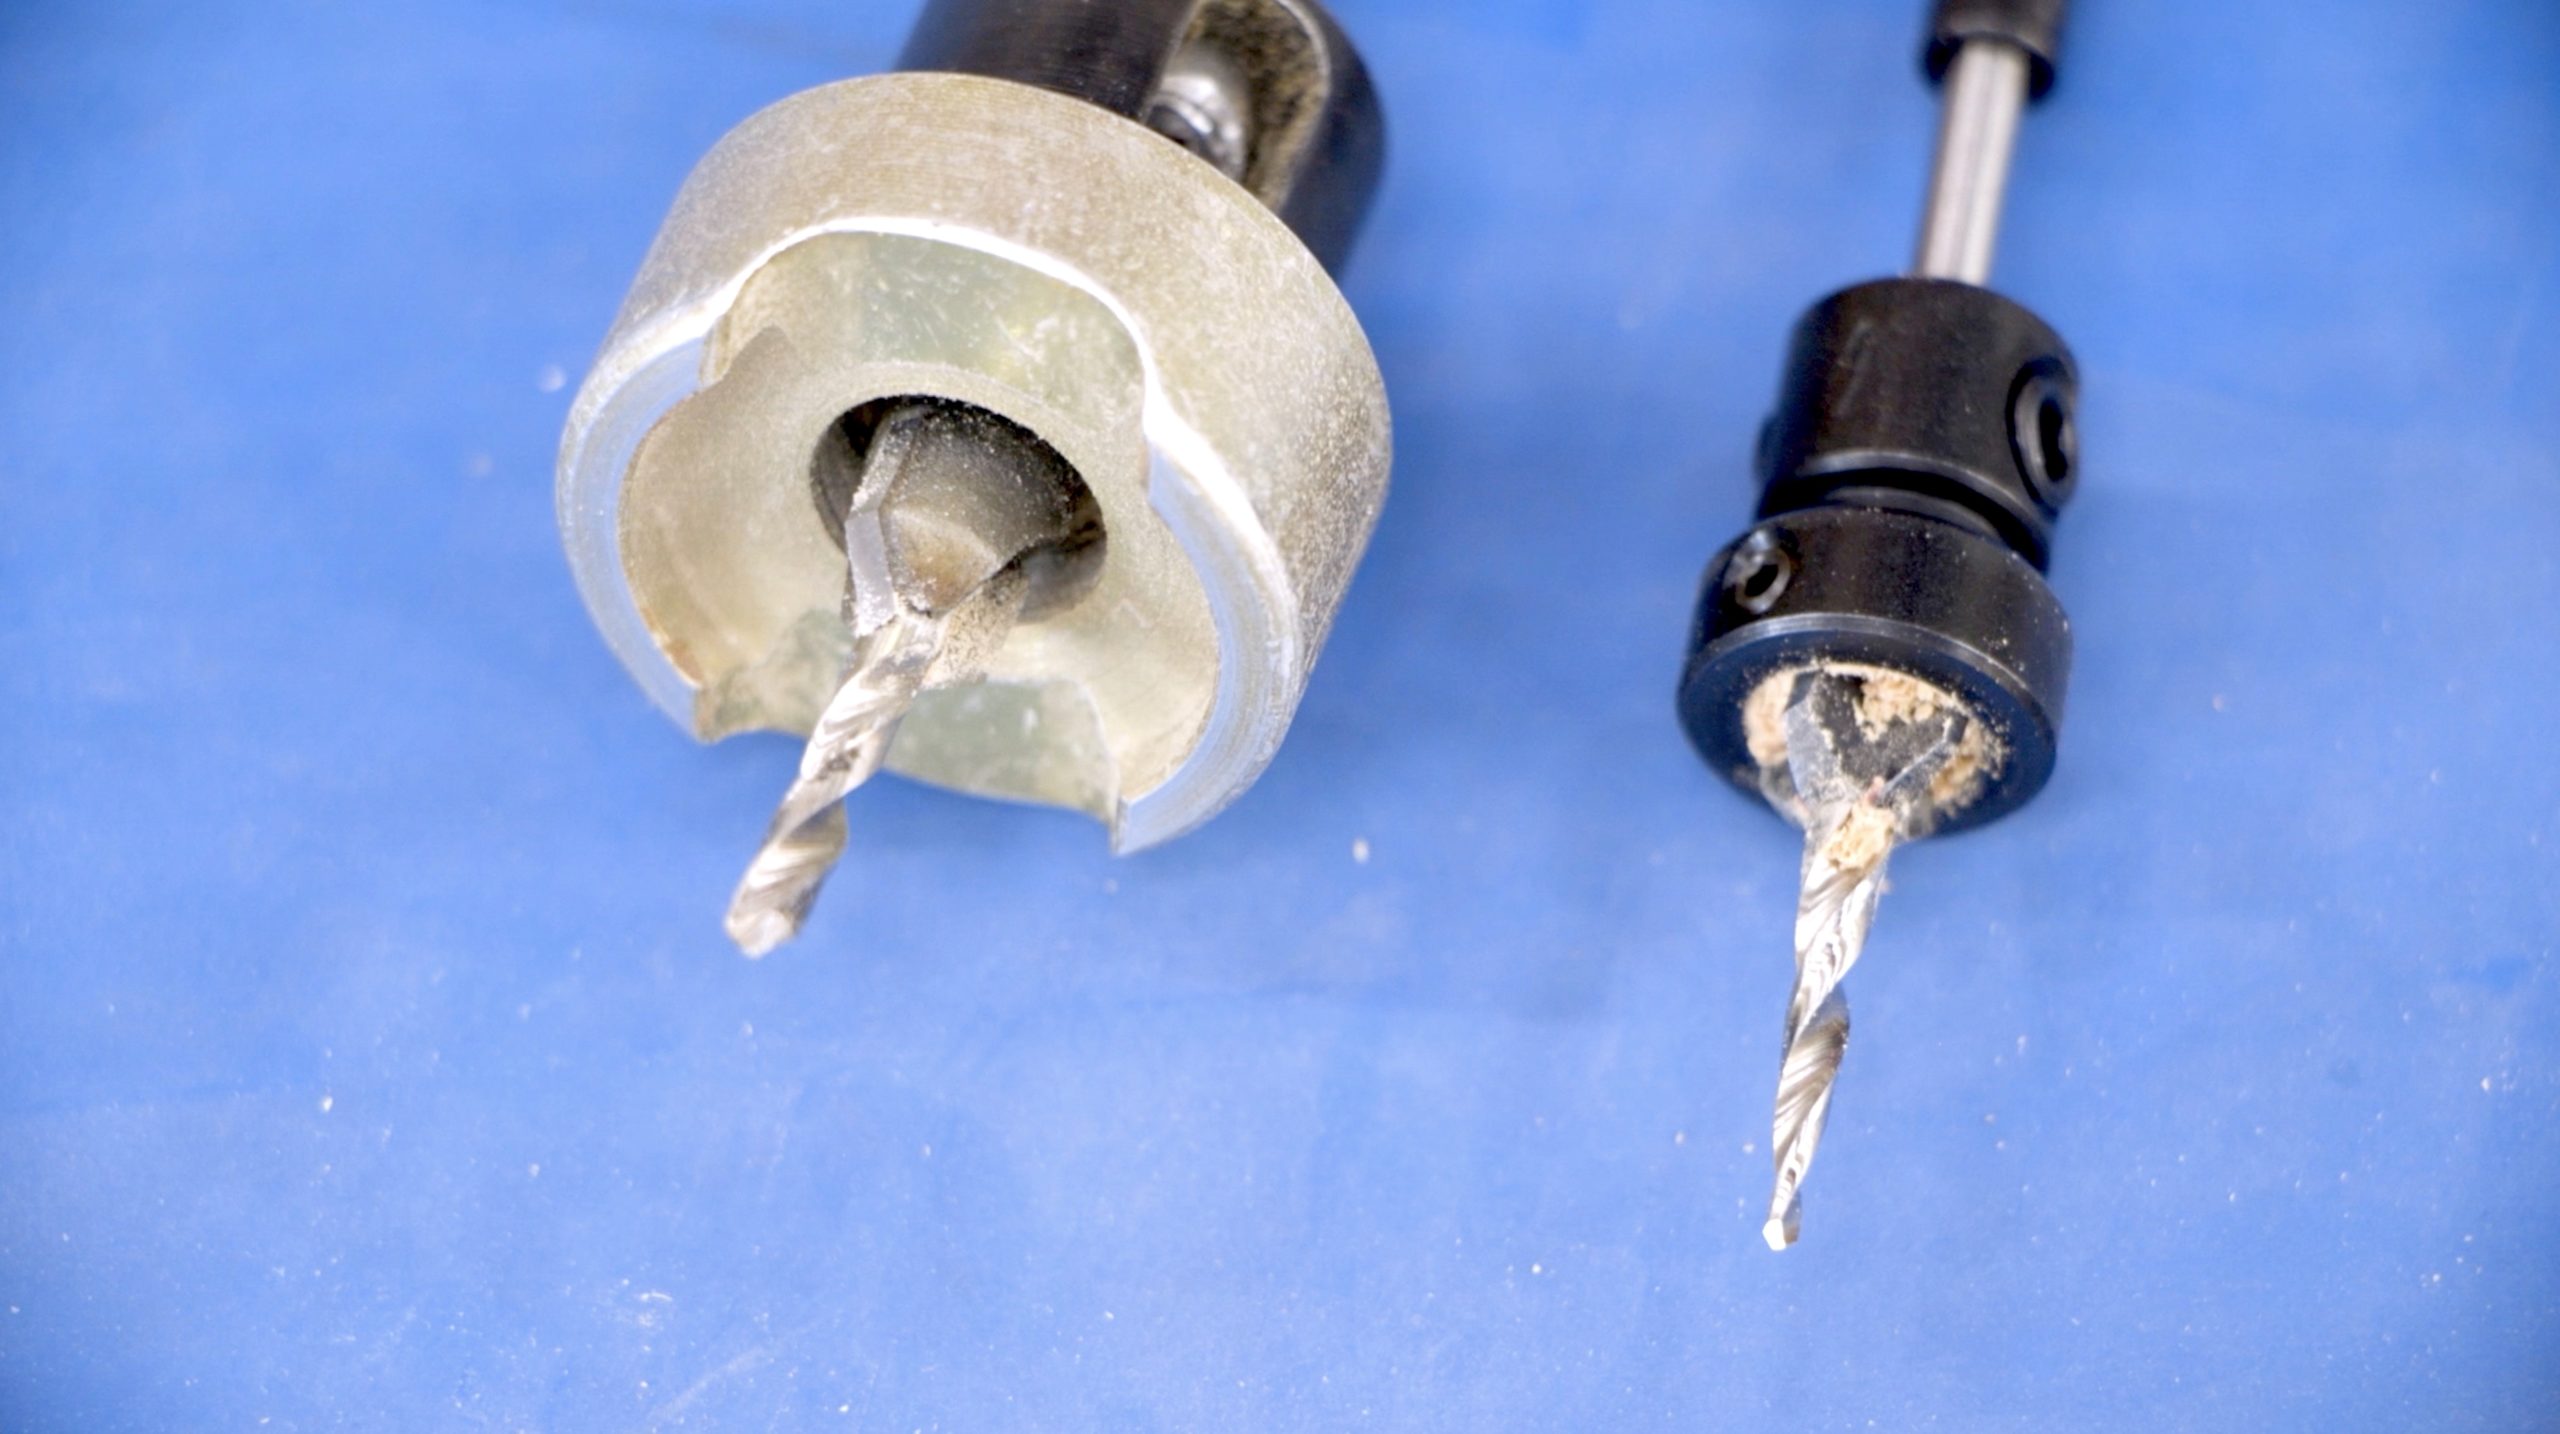
All countersink bits are generally considered part of the furniture-building world but some are better than others. For years I struggled with a basic countersink that certainly worked, but it also left burn marks on the surface and clogged after every hole. A few years ago I came across a much better option in the Amana Countersink Bit. The bit is fully adjustable and features a rotating stop that won’t mar the surface. Furthermore, the design allows the chips to clear instead of clogging.

Stop beating around the bush. This is the countersink you want to buy: Amana Countersink Bit

The post Buy This, Not That | Drill Bits appeared first on The Wood Whisperer.


from The Wood Whisperer https://ift.tt/3hQOtBc
via IFTTT

Friday, July 2, 2021

Verified!

Show notes coming soon.

The post Verified! appeared first on The Wood Whisperer.


from The Wood Whisperer https://ift.tt/3ylZyR4
via IFTTT

10 Things I Wish I Knew When I Started Woodworking

I started by woodworking career in 2004. Over that time I’ve had the good fortune of learning from some great woodworkers who were quite generous with their information. In spite of that, there were some things I just had to learn the hard way. With that in mind, here’s a list of 10 Things I Wish I Knew When I Started Woodworking that will hopefully save you some headaches, time, and money.

  1. Don’t cut all your parts at once.
  2. Don’t rely so much on exact measurements and use relative dimensioning.
  3. Buy material from a hardwood dealer instead of the big box store.
  4. Stop practicing, start doing.
  5. Take inspiration from other designs.
  6. Avoid “bling” tools.
  7. Buy tools on an as-needed basis.
  8. Satisfy a need before upgrading.
  9. Look at the used market for tools.
  10. Don’t stress over perfection.

The post 10 Things I Wish I Knew When I Started Woodworking appeared first on The Wood Whisperer.


from The Wood Whisperer https://ift.tt/3qJ87Tq
via IFTTT

Monday, June 28, 2021

Quilt Rack & Japanese End Table – Pre-Order


The TWW Guild is very excited to announce two new projects that you can pre-order right now for 20% OFF: the Bent Lamination Quilt Rack with Marc Spagnuolo and the Japanese End Table with Brian Benham.

If you purchase both projects, you can save an additional 10%!

Brian’s Japanese End Table starts on July 9th and Marc’s Bent Lamination Quilt Rack starts on July 16th. So don’t delay!

And if you are new to our online woodworking school, you can always try it out with one(or all) of our three FREE projects: Dining Table with Breadboard Ends, Dovetailed Step Stools, and Picture Frames. You’ll find that TWW Guild is more than just a set of plans. It is designed to help you take your woodworking to the next level and you can view all of the additional benefits here.

The post Quilt Rack & Japanese End Table – Pre-Order appeared first on The Wood Whisperer.


from The Wood Whisperer https://ift.tt/2Sy9ZSB
via IFTTT

Saturday, June 26, 2021

Thunderstruck! | TWW Live

Show Notes Coming Soon

The post Thunderstruck! | TWW Live appeared first on The Wood Whisperer.


from The Wood Whisperer https://ift.tt/2UvvV19
via IFTTT

Friday, June 25, 2021

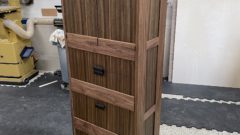
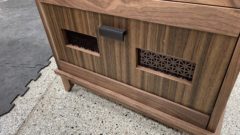
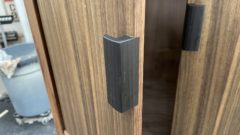
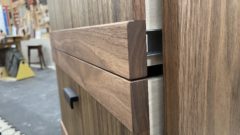
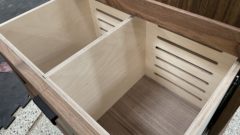
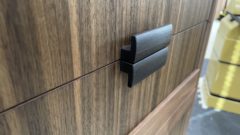
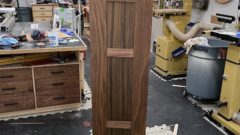
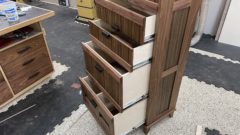
My Most Challenging Project in Years! | Veneered Pantry Cabinet

My mom has a fairly small condo with limited storage space, so she requested a standing vertical pantry cabinet to help provide more room for kitchen items and food. I honestly wasn’t super excited about the project since it was just a cabinet with some drawers and doors. To make things a little more exciting, I decided to raise the challenge level by including veneering, continuous grain, and a unique door and drawer configuration with rails only and no stiles. All told, this was my most challenging project in years.

By far the biggest challenge in this project was keeping the veneer organized. The panel veneer is continuous from top to bottom and each door and drawer is interrupted by a solid walnut rail. So I had to be very strategic about how the panels were glued up and how they were cut apart. Furthermore, because I didn’t want to see any edge-banding, I applied the edging BEFORE the veneer. This way the veneer grain runs all the way from side to side and gives the illusion of solid wood. I mentioned the solid rails already, but those too were cut from single boards to make sure their grain was also continuous.

Was it all worth it? I think so. I have never included this much continuous grain on a single project and frankly I’m surprised I didn’t screw anything up. So I got to exercise some woodworking and design muscles, my mom got a nice cabinet to store her stuff in, and you guys get a neat video showing the whole process. I’ll call this one a win-win-win. I hope you enjoy.

The post My Most Challenging Project in Years! | Veneered Pantry Cabinet appeared first on The Wood Whisperer.


from The Wood Whisperer https://ift.tt/3h26GeB
via IFTTT

Friday, June 18, 2021

Top 5 Hand Tools | TWW Live

Show notes coming soon.

The post Top 5 Hand Tools | TWW Live appeared first on The Wood Whisperer.


from The Wood Whisperer https://ift.tt/3cQ7nGI
via IFTTT

Can you guess what these are? | Mystery Tools

My assistant Jon has been working for me since last Fall and since then, he has come across a few tools and doodads in my shop that he didn’t recognize. I started to quiz him on what each thing does and thought it was funny (and informative) enough to capture in video. These are actually very useful tools but they are definitely niche products. Sadly, I often forget I even have them. Bad Marc!

Here are some links to the mystery tools:

The post Can you guess what these are? | Mystery Tools appeared first on The Wood Whisperer.


from The Wood Whisperer https://ift.tt/3zChEQn
via IFTTT

Sunday, June 13, 2021

Make Stains Look Better! | DIY Blotch Prevention Formula

Get your pre-order in for a Woodworker F.U.E.L Mug! 

What is Blotch?

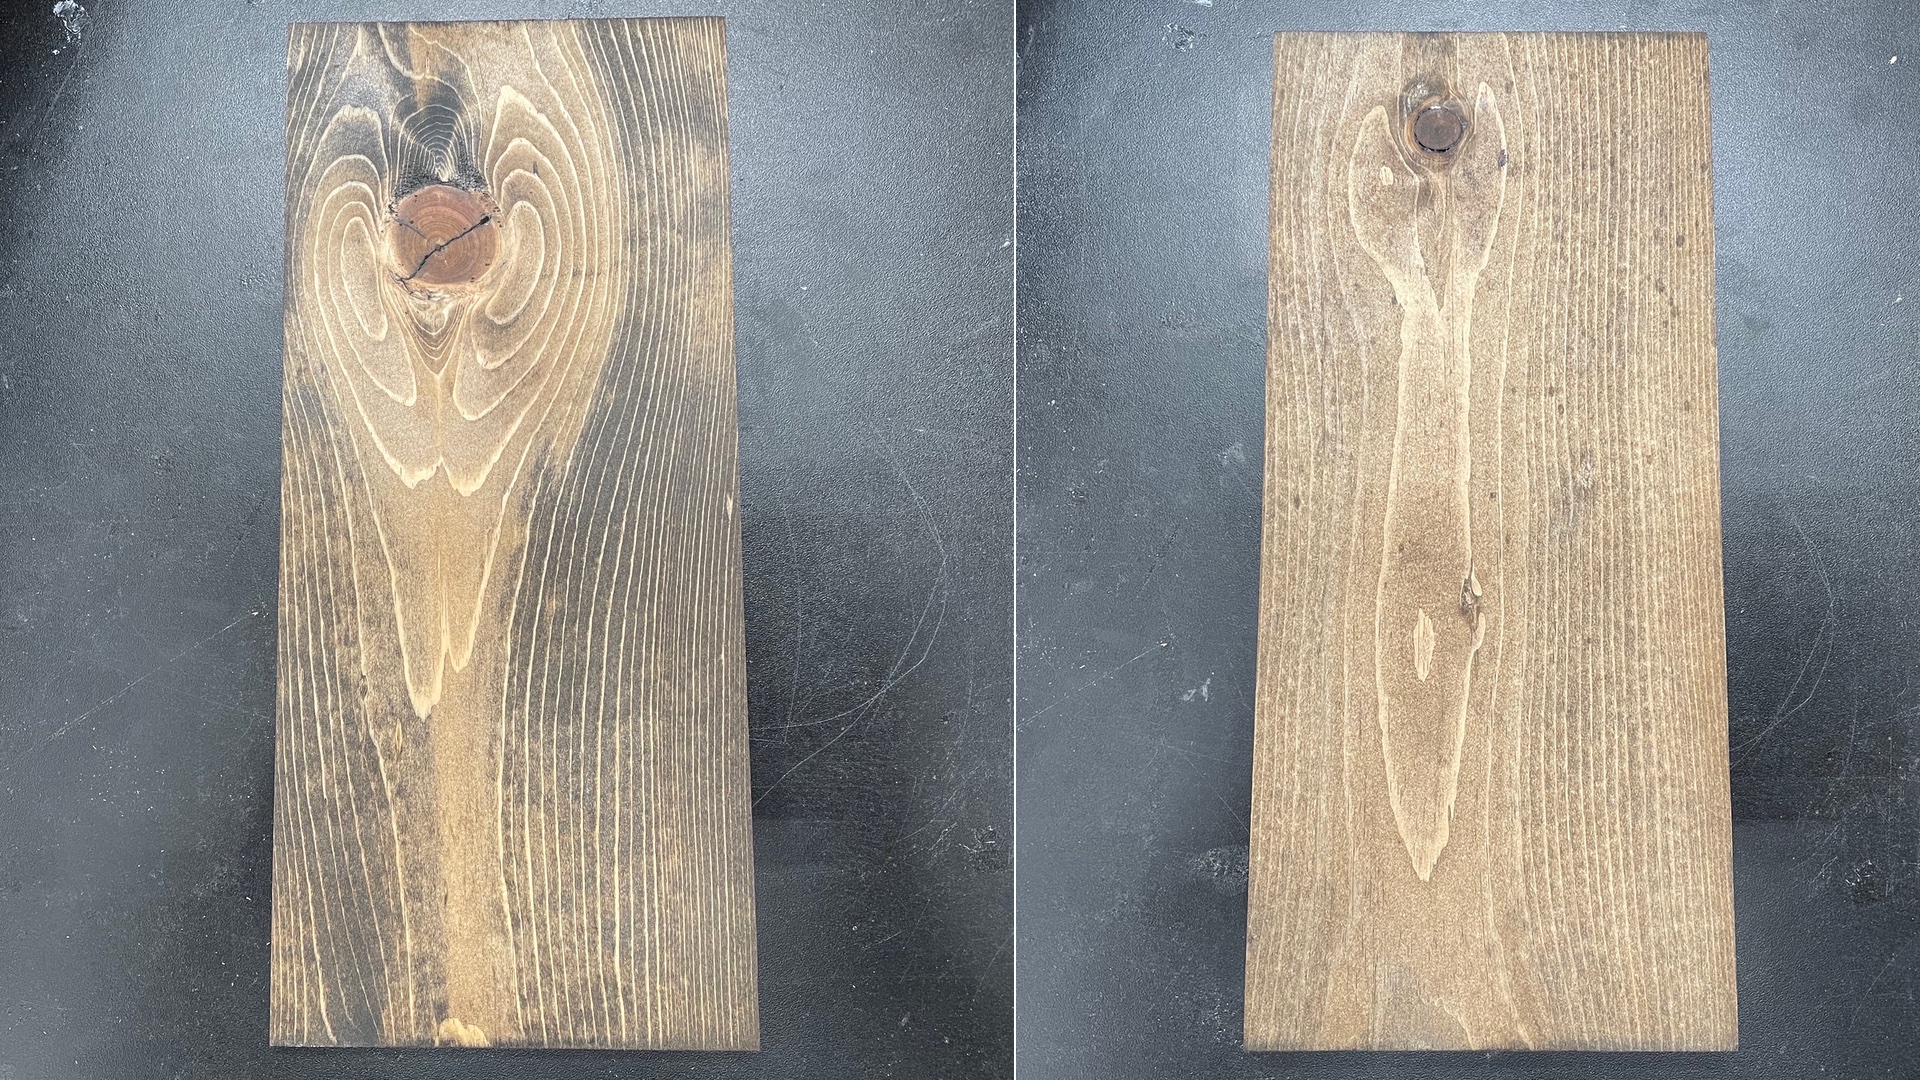
If you stain your projects, it’s likely you’ve confronted a phenomenon known as blotch. This is when the stain absorbs unevenly resulting in a seemingly random arrangement of light and dark areas. In the examples below, you’ll see a pine board with nothing but dark stain on the left. The board on the right was first treated with my blotch prevention recipe. The untreated board is what we’d call “blotchy” as it has lots of contrasting light and dark areas. The treated board has much more consistent color with far fewer dark blotches. Pine is particularly bad when it comes to blotch and if you like the “rustic” look, then you might not need to worry about taking measures to prevent blotch. But for those who prefer a more even stain appearance, you might consider trying my DIY blotch prevention formula.

The Formula

The formula I like to use is actually a combination of two classic blotch remedies: glue size and diluted finish. I consider this recipe a starting point that you can use to develop your own formula for the stain and wood species you’re working with.

3 TBSP Wood Glue + 3 TBSP Water-Based Finish + Water up to 1 Quart

Application

After mixing well, apply to the surface liberally and let it soak in and dry. Once completely dry, sand lightly with 220 grit to knock down any roughness. Proceed with the staining process. Since the mixture is glue, finish and water, it can keep for a very long time. Dump it into an empty quart can and throw it on the shelf until the next time you need it. Be sure to mix well before use.

Making Adjustments

After testing the formula on a piece of scrap, there are two possible outcomes that may require adjustment.

  • Too much blotch? Add a little more glue to your mixture and try again.
  • Blotch is gone but the color isn’t intense enough? Dilute the mixture with water and try again.

Ultimately, this process entails a decent amount of trial and error and keep in mind that with some woods and some stains, you’re just not going to achieve perfection. At some point we need to let wood be wood, flaws and all.

Remember there are lots of methods and products on the market to reduce blotch and in some cases you might find they perform better than this DIY formula. But in my experience, this stuff works as well if not better than anything else and I can make it as-needed out of things I already have in my shop.

The post Make Stains Look Better! | DIY Blotch Prevention Formula appeared first on The Wood Whisperer.


from The Wood Whisperer https://ift.tt/3xhOoMP
via IFTTT

Friday, June 11, 2021

Fickle Miter Slaw

Show notes coming soon.

The post Fickle Miter Slaw appeared first on The Wood Whisperer.


from The Wood Whisperer https://ift.tt/3ggwynH
via IFTTT

Friday, June 4, 2021

Tape Measures – TWW Live

Show notes coming soon

The post Tape Measures – TWW Live appeared first on The Wood Whisperer.


from The Wood Whisperer https://ift.tt/3vVzkUP
via IFTTT

Mirka Deros VS Festool ETS EC | Which Sander Should You Buy?

Today I’m going to try to help you make a decision between the Festool ETS EC150 and the Mirka Deros. The Mirka costs over $125 more and the Festool is already a top of the line sander. So is the Mirka worth it? Let’s see if we can answer that question.

Disclaimer – I’ve been using a Festool sander for over 10 years now, which will result in some unavoidable bias. I did my best to remove that bias by using the Mirka exclusively for three months before doing this review. I also purchased both of these sanders with my own money and have no personal skin in the game. Finally, everything contained within this video is my opinion.

Specifications

The specific sanders I used for this comparison are both 6″ diameter and both feature a 5mm orbit pattern.

 
Festool ETS EC150 Mirka 650X CV
Price $525 $650
Osciallation Options 3 & 5 mm 2 & 5 mm
RPM 4k-10k 5k-10k
Power Switch Standard Button Master Power Button with Paddle
Variable Speed Dial Buttons and Paddle
Weight 2.74 lbs 2.29 lbs
Height 4 7/16″ 3 13/16″
Hose Compatibility Works with Festool Works with Festool
Plug Style Proprietary Twist Lock Proprietary Snap-in
Pad Hole Pattern Ridiculous Ridiculous
Warranty 3 Yr/No Wear & Tear 3 Yr Incl. Wear & Tear

Opinionated Analysis

Ergonomics/Conveniences 

The Mirka is a form factor some of you might recognize. This type of paddle sander is something often found in pneumatic tools. Anyone coming to woodworking from the autobody world will likely prefer this sander over the Festool. The Mirka has a lower center of gravity and tends to feel like a more natural extension of the hand. The Festool is ergonomic too but I’d say the Mirka has a slight advantage here. Between the ergonomics and the slightly lighter weight, the Mirka would be an obvious choice for anyone working on vertical surfaces or ceilings. That kind of work is few and far between for me as most sanding I do is flat and horizontal. So that feature isn’t quite as important to me as it might be to someone else.

Now you might think this makes the Mirka the undisputed champ with regard to ergonomics but there’s a catch: the paddle. I’m honestly not a fan. In order for the sander to run, the paddle has to be depressed the whole time. Let off and the sander stops. The fact that the paddle acts like a variable speed control of sorts is totally lost on me. It’s like a gas paddle that is either at 0 or 60 mph since it’s really difficult to keep the paddle halfway pressed down. And for the work I do, on the fly speed adjustments are unnecessary. I much prefer a dedicated on/off button that stays on until I hit it again. And I nearly always run my sanders at full speed anyway. A lot of folks have no problem keeping their hand on the paddle but for me, during long sanding sessions, I like to change up my grip to help reduce fatigue and cramping and that’s a lot harder to do when you have to keep your hand on a paddle.

This paddle also creates a little bit of a liability as you can, and will, likely place the sander upside down at some point to change the paper. If the power is still on, the sander will spin and give you a little surprise at the least and a sandpaper cut at the worst. You have to be sure to turn off the master power before flipping the sander over. You may also set the sander down and accidentally wind up pressing the paddle only to watch the sander go for a little walk.

Speaking of changing paper, the pad on the Mirka spins freely. While not a huge deal, this does make it slightly more frustrating to change the paper. The Festool doesn’t spin as easily so it makes it a lot easier to line up the goofy-ass hole patterns.

Performance

Both sanders do a great job and I could not discern a difference in the resulting surface quality between these two. I specifically used the same sandpaper I’ve been using for years so that if there were any differences I’d be able to spot them. You might notice that my paper has the old standard hole pattern and doesn’t even make use of the goofy hole patterns both of these sanders use. Even still, both of them have absolutely adequate dust collection.

How about sanding speed? One of the things I hear a lot about Mirka converts is that the Mirka removes stock noticeably faster. Unfortunately, I didn’t see any evidence of that at all. I even ran a couple of tests just to see some side by sides and both sanders took an equal number of passes to remove the pencil lines I placed on the surface. And after using it for 3 months I can’t say I noticed any practical difference in sanding speed and efficiency. And just as a second data point, I talked with my assistant Jon about this and he agrees that the Mirka is not saving us any time.

Now one interesting thing I noticed while sanding a cedar bench top. The Western Red Cedar is really soft wood but it does have dense knot areas periodically. For whatever reason, the Mirka tended to kick and whip a little more when it made contact with those dense areas. The Festool just seemed to be more stable with fewer jerks and kicks. This was the only time I observed that sort of behavior, as with any other sanding job the Mirka was just as stable as the Festool.

Both sanders are low vibration and both are a huge step up from home store brands, but between the two the amount of vibration feels pretty much the same.

Accessories

Both companies offer a variety of pad options, a dust extractor, and sandpaper. Mirka has the advantage in sandpaper just by the shear volume of options. That said, good luck making sense of them. The Mirka sandpaper page reminds me of the Cheesecake Factory menu. I can’t figure out what I want so I just get the cheesecake. This is further exacerbated by goofy non-descriptive names like Abralon, Jepuflex, and Mirlon….which all sound like wizards from Lord of the Rings. Festool has a smaller/simpler selection of abrasives but they also feature goofy names like, Granat and Rubin.

One area Festool holds a huge advantage is the number of other tools they produce. There are obvious advantages to having a bunch of tools from the same brand and if you go Mirka you’re pretty much limited to sanders and polishers. If you go Festool you have access to things like saws, routers, planers, drills and of course that Domino thing. So that’s something to keep in mind depending on what you want to do with future purchases. Now if you already have a Festool vac and maybe even a boom arm like I have here, you can pretty easily include the Mirka sander in that setup just by running the Mirka cord alongside the Festool. Not that big of a deal.

Who Should Buy the Mirka Deros? 

  • People who have a history with pneumatic sanders. If you’re used to that paddle style sander, you’ll be right at home with the Deros.
  • People who tend to do a lot of vertical or overhead work. Though I’m not a fan of the paddle, the lighter weight will be a benefit in the long run.
  • Gadget geeks: Mirka has an app. Not sure how useful the info is but apparently you can track speed data as well as vibration exposure. I have a watch that reminds me to breathe…..so why not.
  • People who have an anger boner against Festool. Let’s face it. Some people would love to spend $125 more just to stick it to those Festool-lovers.

Who Should Buy the Festool ETS EC? 

  • People who like the idea of a system approach and plan to add more tools to their arsenal. Festool definitely gives you a more cohesive experience with various tool offerings.
  • People who do mostly shop-based flat sanding. If you’re not going vertical, the lighter weight of the Mirka is somewhat irrelevant. And while the Mirka has the lower center of gravity, remember I did experience that jumping when sanding a board that had a lot of knots in it, and the Festool seemed to navigate those areas with more grace. Perhaps the weight plays a role in that.
  • People who want to save $125.

Conclusion

I think the real sticking point here is the $125 difference (in the US). My goal was to determine if the Mirka is better than the Festool and if it is better, is it $125 better? Without a doubt I have to say “No.” These sanders are much more alike than they are different and the differences come down to really nit-picky pros and cons. So if one of the pros or cons I mentioned previously is a real concern for you, that might help you make a decision. But for most woodworkers, I have to say they’d have trouble justifying the additional expense of the Mirka. Festool is already considered one of the best (and most expensive) sanders on the market. So if the Mirka comes in $125 MORE than the Festool, I need to see a good compelling reason for it and I don’t.

Now if you’ve used both sanders and walked away with a different impression, let us know about it in the comments. I’m just one person with one opinion and there are a lot of variables at play here. My personal experience doesn’t invalidate yours in any way, but if you disagree with me you’re wrong (wink wink).

The post Mirka Deros VS Festool ETS EC | Which Sander Should You Buy? appeared first on The Wood Whisperer.


from The Wood Whisperer https://ift.tt/3ciCXwn
via IFTTT

Friday, May 28, 2021

Refinishing a Door Without Taking it Off The Hinges

Few projects bring out my procrastination more than refinishing a door. Without a doubt the best way to get the job done is to remove the hinge pins, lift the door off, and  set the door flat on a couple of sawhorses. It’s so much easier working on a horizontal surface than a vertical surface. But if your door is big and you’re working alone, the door removal process can be daunting. Furthermore, if you’re sanding/stripping off an old finish and then applying multiple coats of the new finish, the project could last for several days. That means you’re either putting the door back up every night or you’re leaving your house wide open while you and your family sleep. No bueno!

Fortunately, it is possible to refinish a door without taking it down. In my case, I was fortunate in that the door wasn’t in terrible shape to begin with. So all of the recessed details only needed a light sanding and cleaning instead of a full finish removal. The main flat surface of the door, however, was completely sanded down to bare wood. And since my plan was to simply replicate the previous stain color, I wasn’t concerned about the recessed sections looking different than the flat areas.  After sanding the door is treated for blotch (alder likes to get all blotchy and splotchy when stained) and then stained using Watco Dark Walnut Danish Oil. I then top-coated with a marine varnish: Epifanes Matte.

Here’s the step by steps for the entire process I used to refinish my front door without taking it off the hinges.

  1. Develop a strategy. Although you won’t be taking the door down, you will need to keep your door open for most of the day. Have a solid plan in place to keep kids and animals safe during this time. Baby gates are a great way to block the door while keeping the air flowing through the doorway. Also, plan out how many days the process will take. Make sure you research the dry time for each coat of finish.
  2. Remove anything from the door that you don’t want to get scratched, dusty or coated with finish. That includes the locks, strike plates, adornments, and the door sweep. By the way, the door sweep might be a sticking point. In some situations, you can’t remove the door sweep without taking the door down. If that’s the case, you may have no choice but to take the door down.
  3. Remove the old finish. The amount of time, effort and materials you need to put into this part of the process really depends on the existing finish. Thick stubborn finishes may require a chemical stripped or a heat gun and a scraper. Older worn finishes can often be removed with sanding alone, as is the case with my door. I start with 120 grit, progress to 180 grit, then finish with 220 grit.
  4. Prevent Blotch. If you plan to stain and your door is made of a blotch prone wood (alder, poplar, pine, maple, cherry, birch, just to name a few), you’ll want to apply some sort of pre-stain conditioner before staining. The homemade formula I used was 2 TBSP of Titebond Original glue, 2 TBSP of Water-based finish, brought up to 1 quart with water. The material is simply painted onto the raw wood. Once dry, I sand very lightly with 320 grit to knock down any roughness on the surface.

The post Refinishing a Door Without Taking it Off The Hinges appeared first on The Wood Whisperer.


from The Wood Whisperer https://ift.tt/3fQcnvr
via IFTTT
Friday, May 21, 2021

Ava for the Win!

  • 00:00:38 – Welcome back to the WoodWhisperer Live Show
  • 00:01:02 – Thank you to our Patreon and YouTube members! https://ift.tt/2gRui6g
  • 00:01:25 – Pantry project preview
  • 00:03:40 – Are you going to anchor the pantry?
  • 00:06:17 – Why do the drawer bottoms look darker?
  • 00:07:10 – Is there just airflow in the front of the bottom drawer?
  • 00:08:35 – Are there fluorescent wood finishes? https://ift.tt/2QF8Rf1
  • 00:09:29 – Do you ever work the sole on a brand new plane? https://ift.tt/39iJLZo
  • 00:12:58 – Are you going to build a table for your Recteq? https://ift.tt/3u8AnPE
  • 00:16:28 – How can I strip and redo my painted wooden deck?
  • 00:17:54 – What’s the best way to keep a floating table top from bowing? https://ift.tt/2PxSEo4
  • 00:20:13 – Why doesn’t commercial-made furniture have to worry about wood movement?
  • 00:21:30 – Do you have an opinion on the Beadlock system? https://ift.tt/3hWtXRp
  • 00:22:35 – Do you attach an exterior tabletop differently than interior?
  • 00:23:42 – How would you prevent rust when storing your cast iron tools for a couple months? https://ift.tt/3yvRZII
  • 00:25:21 – Is 5/16ths” hard maple too small for a display cabinet?
  • 00:26:50 – What thickness is your T1-11 panel?
  • 00:27:45 – Any thoughts on Andy Klein’s new drill press fence? https://youtu.be/W4tbooTudSs?t=987
  • 00:29:45 – What plane is just behind you?
  • 00:33:35 – Have you heard any scuttlebutt about the Harvey tablesaws?
  • 00:36:50 – Where do you get your stock? 00:40:15 – Any word on your Festool sander repair?
  • 00:40:50 – What’s the deal with three-phase power?
  • 00:42:18 – What’s your watering stone preference?
  • 00:45:10 – Should I run my 2 HP tablesaw as 110 or 220?
  • 00:47:43 – Systainer winner! Congratulations!

The post Ava for the Win! appeared first on The Wood Whisperer.


from The Wood Whisperer https://ift.tt/3ys6HQX
via IFTTT

Friday, May 14, 2021

Marc’s Beagle Bark

Show notes coming soon.

The post Marc’s Beagle Bark appeared first on The Wood Whisperer.


from The Wood Whisperer https://ift.tt/33JVpJD
via IFTTT

Friday, May 7, 2021

Mom’s Breadboard End Dining Table

If you like what you see in this project and you’d like even more information, you can get the full course FOR FREE in the Wood Whisperer Guild. No credit card required and no commitment.

Get access now!

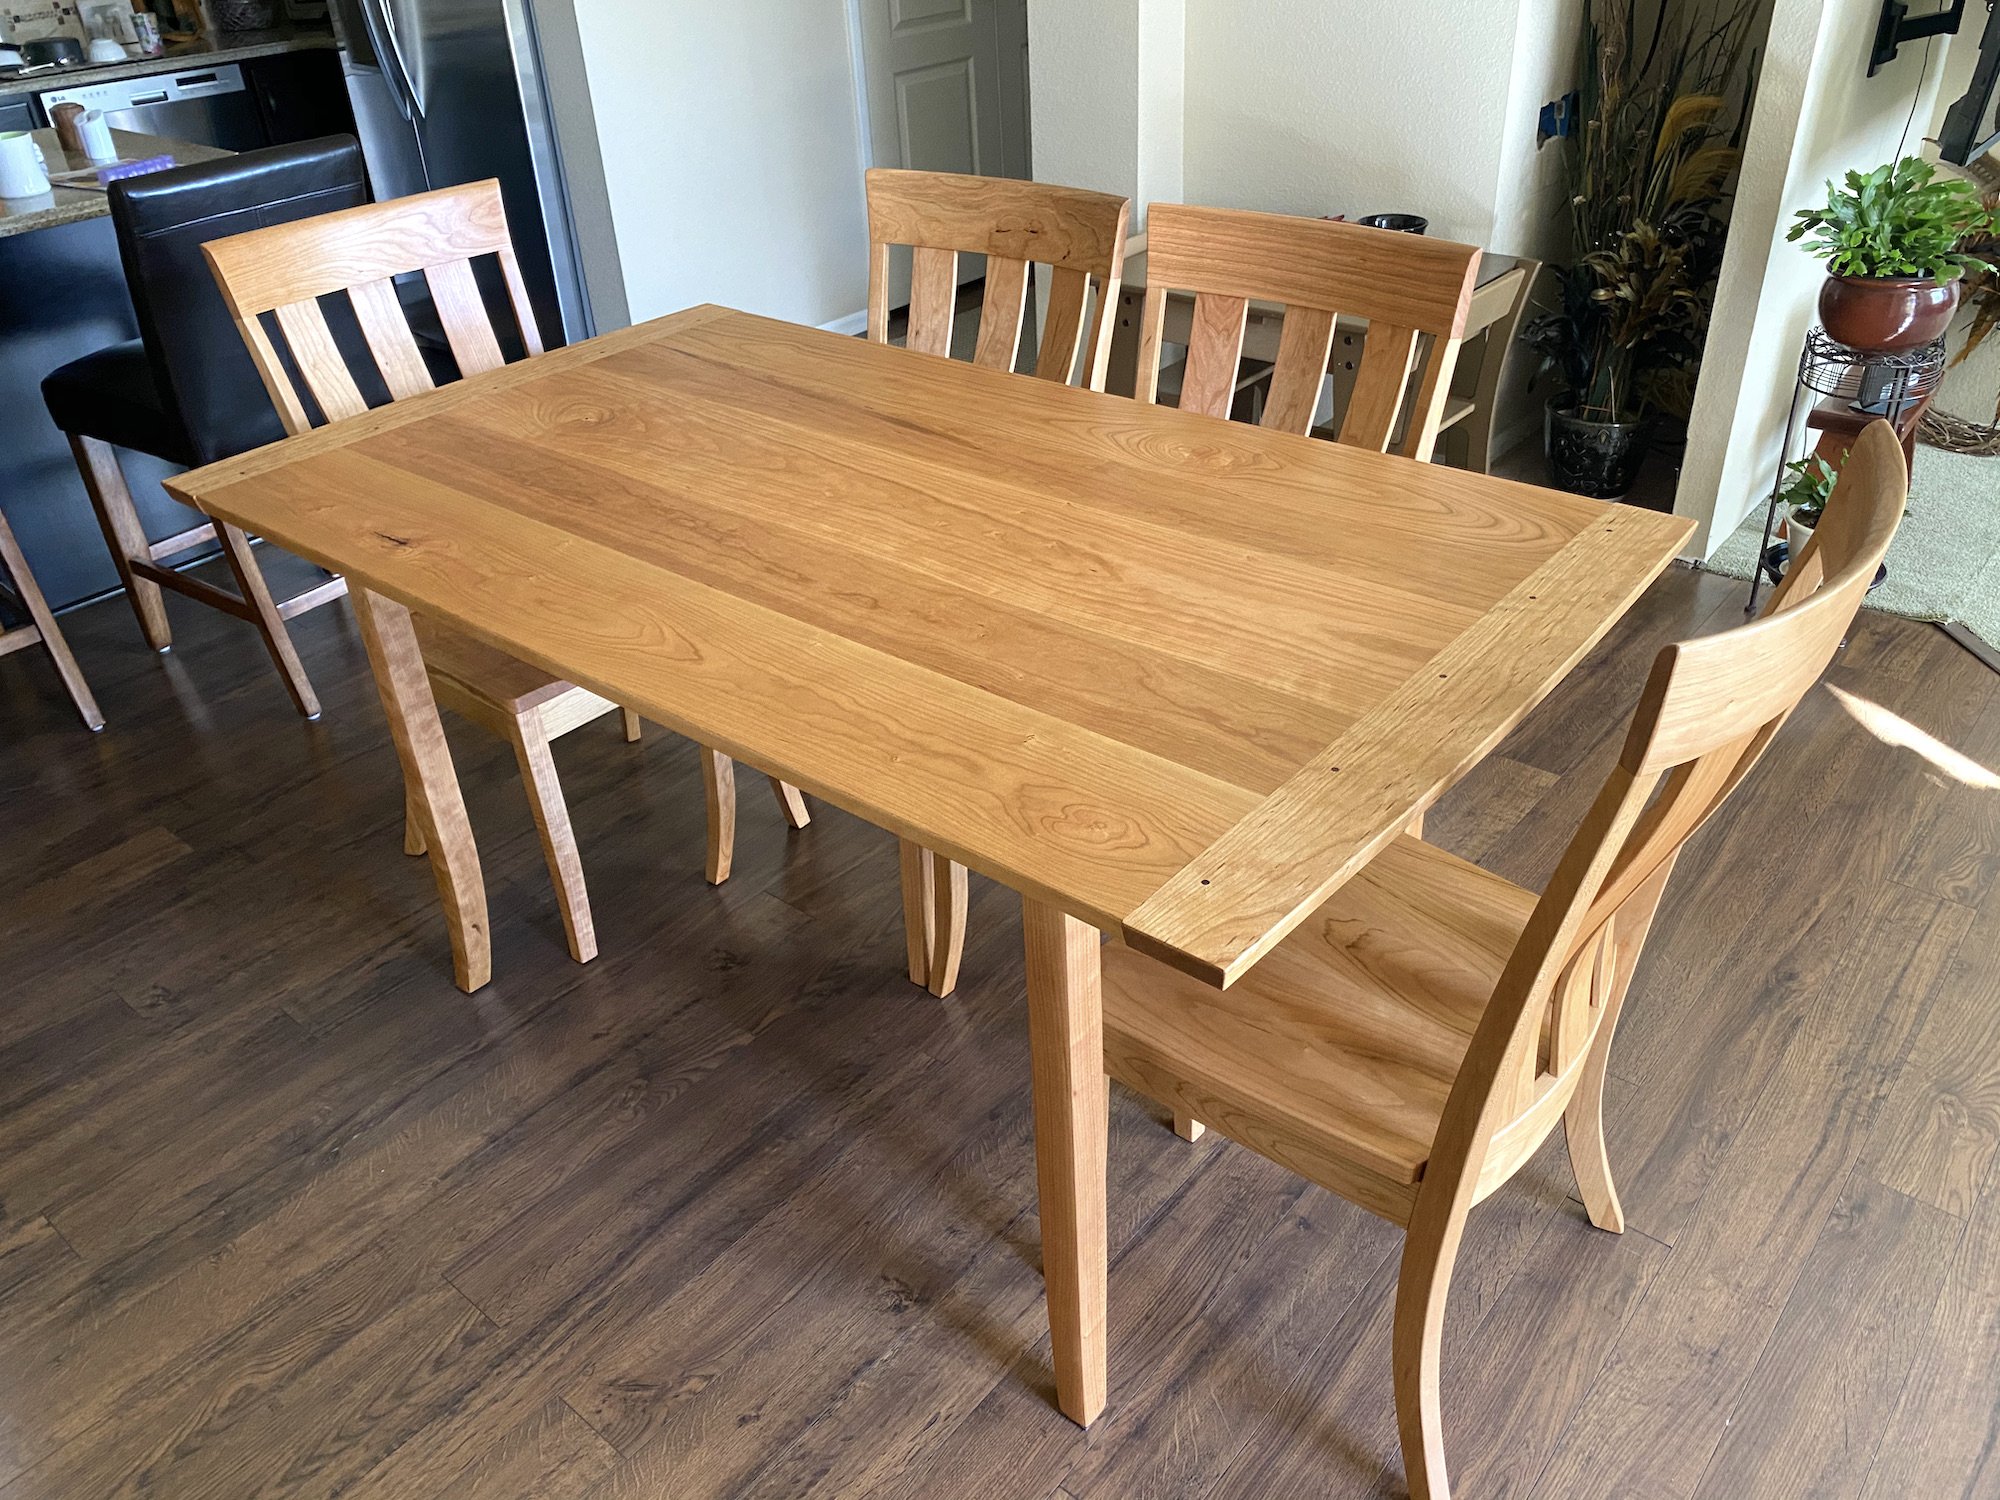
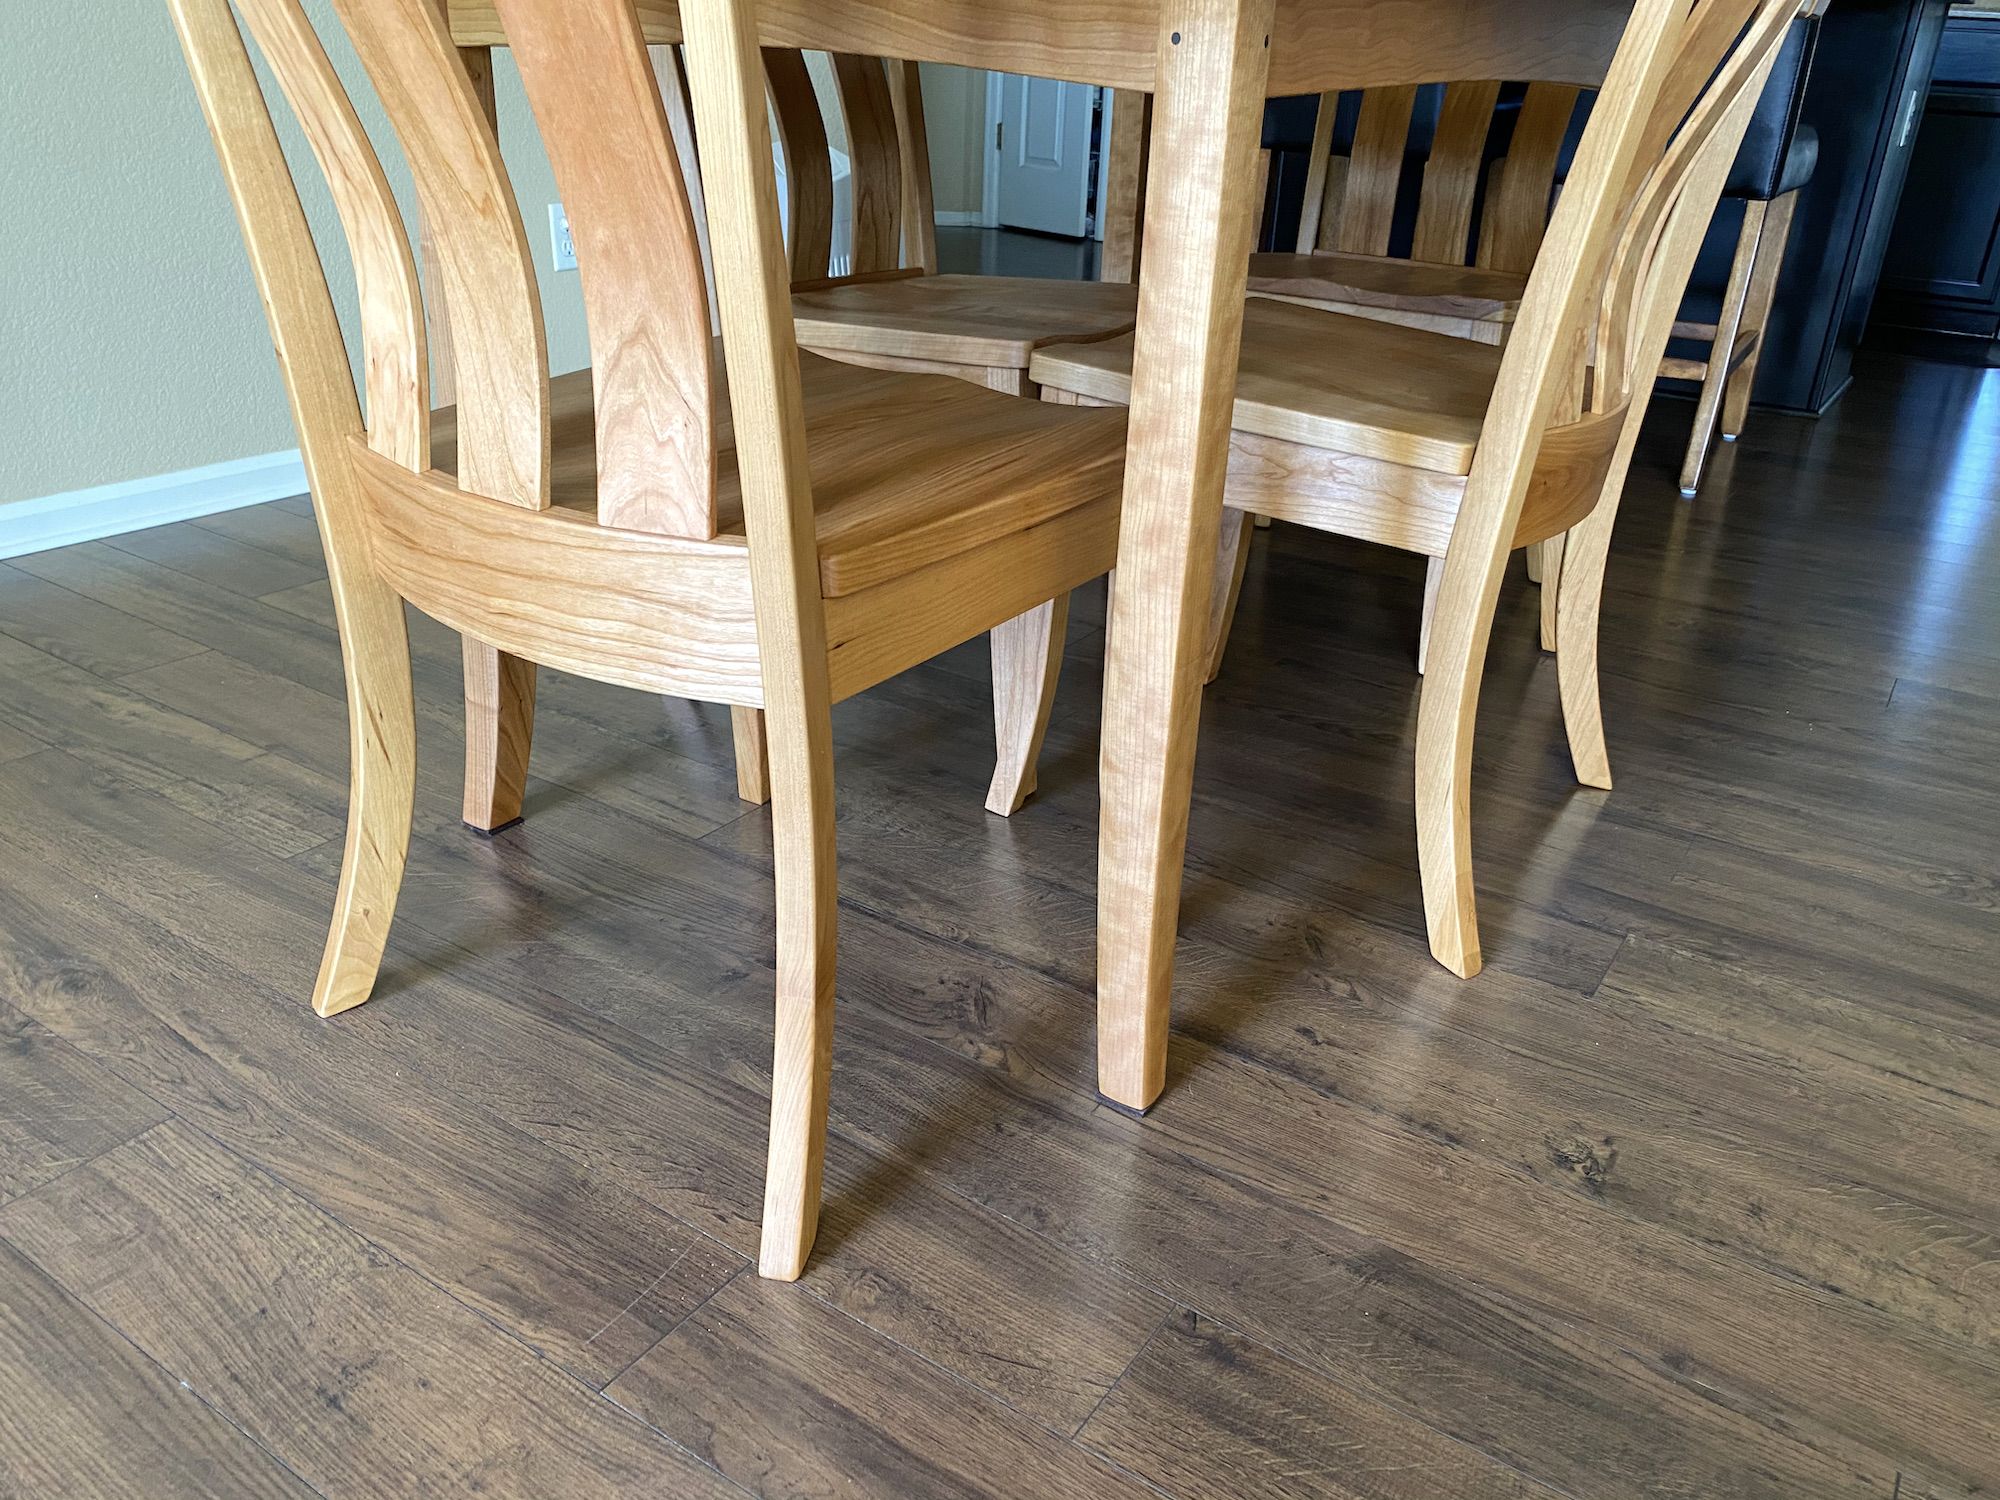
My mom recently moved into a new condo and wanted a table that was as small as possible while also being able to accommodate six diners. This beautiful cherry table fit the bill nicely. It features breadboards, elegant curves, and compound curved legs. The legs were shaped so that they match the chairs we picked up from my buddy Matt Cremona. His chair kits are a great compromise if you need some high quality chairs and you don’t have time/skill/desire to build your own.

By the way, if you want to learn more about breadboard ends, check out my demo video Breadboard Ends: The Joint Most People Get Wrong

Stuff I Used:

The post Mom’s Breadboard End Dining Table appeared first on The Wood Whisperer.


from The Wood Whisperer https://ift.tt/3eovrBE
via IFTTT

Thursday, May 6, 2021

Woodworking Teacher Appreciation Day

show notes coming soon

The post Woodworking Teacher Appreciation Day appeared first on The Wood Whisperer.


from The Wood Whisperer https://ift.tt/3eU2Q6c
via IFTTT

Thursday, April 29, 2021

Ugh Lumber Prices – Am I Right?

Show notes coming soon.

The post Ugh Lumber Prices – Am I Right? appeared first on The Wood Whisperer.


from The Wood Whisperer https://ift.tt/3t2ODJi
via IFTTT

Friday, April 23, 2021

Outdoor Finishes | Real World Results

It’s hard to find a topic in woodworking that’s more confusing and more full of opinions and hearsay than finishing. Double that for outdoor finishing since there’s the additional variables of climate and exposure. One person will swear by one product but another person will tell you to avoid it like the plague. I’m in the fortunate position that everything I do is documented in some fashion so I will often “take one for the team” by putting a piece of furniture out in the elements with a particular finish just to see what happens. I can then report those observations in the name of SCIENCE! These real world observations add to my bank of theoretical knowledge and allow me to supply and informed opinion whenever I’m asked the dreaded “What finish should I use?” question.

In this video we’ll discuss several pieces of furniture I’ve made throughout the years, how they were finished and how they held up. In some cases, a refinish was necessary and we’ll talk about that too.

Finishes Mentioned:

10 Helpful Outdoor Finishing Tips

  1. A finish failure does not always mean the finish doesn’t work. In many cases, there are other variables at play like wood species, application process, misuse, and exposure that lead to a finish failure.
  2. With enough exposure and neglect, ALL FINISHES WILL FAIL. The key to remember is that when the finish fails, a film finish will tend to fail more spectacularly as the finish peels and bubbles up and generally looks like crap. This is one reason why I’m gravitating to non-film finishes on my outdoor pieces.
  3. CPES/Epifanes failures were my fault. In the past I have called the CPES/Epifanes combination “bulletproof” and as you can see that’s not really the case. It’s a great finish and with maintenance, it can last a long time. Neglected and exposed to lots of UV, it’s an ugly mess. Not the product’s fault though. It’s my fault. And the pieces that have limited UV exposure have held up great.
  4. Know yourself and know the situation. Are you the type of person that can commit to a maintenance schedule? If not, throw on some sort of non-film finish and let it age over time. If you don’t plan to do any maintenance, don’t apply a film finish unless the piece will live in the shade.
  5. UV is far worse than moisture. This is not a fact so much as my observation that UV is the real enemy, even more so than moisture. No matter what finish I used, if direct extended UV exposure was involved the finish failed quickly.
  6. Pigments are your friend. This is why many decking products are called “stains” as they’re really just an oil with color added and that color helps block the UV rays from hitting the wood fibers. Clear finishes can have UV absorbing properties too but from my experience, nothing works better than something with actual pigments in it. This is also why one of the best finishes for outdoor pieces is……gasp…..paint!!!
  7. Make slatted table tops. I’ll never design something for the outdoors again that has a full solid top. Slats are the way to go as the water can run off and the boards can thoroughly dry. Part of the reason my big table failed multiple times was because the water and snow would collect on the top, increasing the exposure time unnecessarily.
  8. Wood species matters. Another reason the western red cedar table had such a hard time was the fact that the wood was super soft. Yes, it’s rot resistant, but every dent and scratch created a potential failure point for a film finish. And that’s exactly what happened on my table and benches. A denser wood won’t dent as easily and provides a better base for the finish so scratches and blunt impacts won’t stress the finish as much. The Sapele Adirondack chairs are a great example of how that kind of film finish can work on a harder species. From now on, if I work with Western Red Cedar I’ll be using non film-forming finishes.
  9. The epoxy foot pad technique works. Epoxy pads on the feet actually do work and are a nice insurance policy for anything with ground contact. Prevents splitting and cracking from excessive moisture wicking up into the end grain.
  10. There’s nothing wrong with letting the wood gray naturally. Some people prefer it and as you can see, it can be a lot of work maintaining outdoor wood projects. Not everyone wants to put in that kind of time. So if you don’t mind the weathered/gray look and feel, go au natural.

The post Outdoor Finishes | Real World Results appeared first on The Wood Whisperer.


from The Wood Whisperer https://ift.tt/3dL0Uxt
via IFTTT