
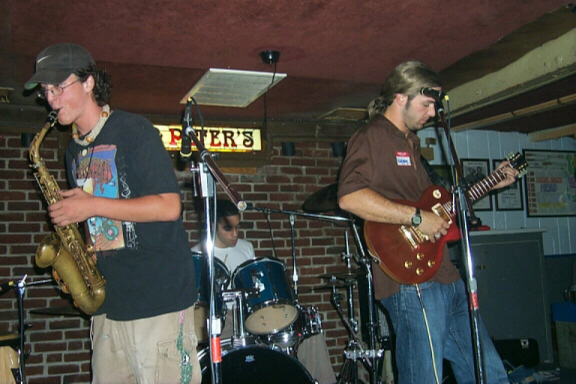
When I was in 10th grade, I went to my friend Joe’s house. Joe was a pretty cool dude. Good looking, played the drums, effortlessly confident. He took me upstairs to his bedroom where his drum kit lived and started playing along to music blasting through the speakers of his boom box. Remember those?
Most people would call it an assault on the eardrums. I was mesmerized.
Suddenly I wasn’t in Joe’s bedroom anymore. I was on a stage. Tommy Lee was in front of me, Vince Neil was belting out Girls, Girls, Girls, and somehow I belonged there. If you don’t like Mötley Crüe, get your own fantasy!
That moment stuck with me. It was a turning point. I realized I didn’t just want to watch music happen. I wanted to be part of it.
Making It Work
Luckily, I had musicians in the family. My step-dad was in a country music band and I had a few uncles that had extra equipment laying around. Before long, an old drum set that had been collecting dust in an attic made its way into my basement. It was incomplete, mismatched, and missing hardware.
No tom mounts? No problem.
Using some of my Jersey ingenuity, I threw a ladder over a couple of garbage cans and dropped the toms between the rungs. A little rope, some wire, questionable engineering decisions, and boom, a mostly operational drum kit. I wish I had a picture of it. It was ridiculous. But it worked. I started teaching myself how to play.
Looking back, I’m amazed my mom allowed it. Acoustic drums in a basement are not subtle. And we lived in a small house in Trenton, NJ with no insulation between the basement and main floor with neighbors in close proximity. Sound just went right through ceiling and walls. But Mom always said she liked hearing it because it meant I was home and safe. As a parent now, I understand that in a way I couldn’t back then.
The Magic of a Jam Session
Not long after, I found a few friends at school and we started playing together. We weren’t good. We never would be. But that wasn’t the point.
If you’ve never played an instrument, here’s something you might not realize: there’s a huge difference between playing music you’ve memorized (or read) and creating something together in real time.
A jam session usually starts small. A guitarist plays a few chords. The bass player finds a groove underneath it. The drummer listens for the pulse and locks it in. Everyone is playing their own part, but they’re also constantly listening, adjusting, reacting.
It’s creative tension and cooperation happening simultaneously. When it clicks, it’s electric. You’re interpreting someone else’s intention in real time. You’re offering your own ideas without overpowering the whole. You’re building something none of you would have created alone.
That feeling is hard to describe. But when you experience it, you chase it.
The Woodworking Version
Years later, I realized I’ve been chasing that same feeling in the shop. I don’t think we talk enough about collaboration in woodworking. A lot of designers operate solo. And that makes sense. Designing is personal. It’s vulnerable. It’s easy to want full ownership of the idea. But that’s rarely my approach.
I consider myself an average designer. Most of what I create is derivative in some way, influenced by the thousands of pieces I’ve studied and the countless woodworkers I’ve learned from over the years. So why would I pretend my ideas spring from a vacuum? If anything, I want input.
Not from just anyone, of course. I’m selective. I trust experience. I value thoughtful critique over unsolicited opinion. And I care deeply about aesthetic alignment. But when I find the right collaborator, magic happens.
My SketchUp Jam Partner
One of those collaborators has been Brian Benham. For years, Brian helped bring Wood Whisperer designs to life. He created plans, built SketchUp models, and contributed to the design credit on many Guild projects. If you’ve taken a Guild course, you’ve seen his fingerprints. Brian even has several courses in the Guild including one on designing in Sketchup.
Here’s how it usually works. I send Brian everything I have, measurements, constraints, angles, reference photos, and my very imperfect SketchUp model. I’m competent enough in SketchUp to get things 50 to 60 percent there. An approximation, but not refined.
Then we hop on Zoom. Brian opens SketchUp and shares his screen. And this is where it feels exactly like a jam session.
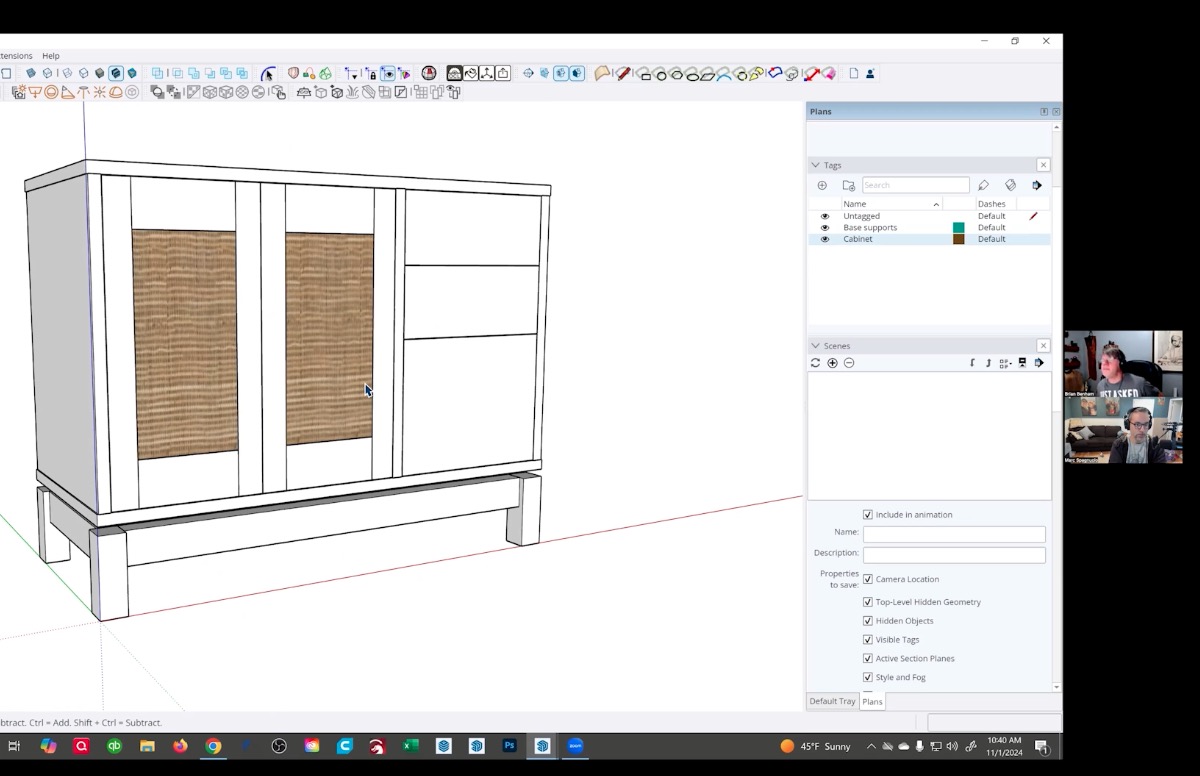
I’ll say, “What if we soften that curve?” He draws it instantly.
“What if that leg tapers a little more aggressively?” Done.
“Can we see what it looks like with a different angle?” On the screen in seconds.
But he’s not just drafting my ideas. He’s reacting. Suggesting. Improving.
“Have you considered lowering the rail?”
“That proportion feels heavy.”
“What if we echoed that angle here?”
Back and forth. No ego. No defensiveness. Just exploration.
I’ve done this with Brian 20 or 30 times over the years. Just recently, we did a quick consult on a table I’m building for my buddy Jason. The concept wasn’t fully formed, but after an hour of jamming, it was clear enough to move confidently into prototypes and shop work.
That’s the payoff. Before a single board is cut, the design is stronger.
Why This Matters
Collaboration does a few powerful things:
- It confirms good instincts
- It exposes weak ones
- It prevents expensive mistakes
- It accelerates refinement
- It pushes you beyond your default thinking
Most importantly, it reminds you that woodworking doesn’t have to be a solitary pursuit.
We romanticize the lone craftsman. But historically, workshops were collaborative spaces. Apprentices, masters, peers, all working, observing, critiquing. The modern version might just be Zoom and SketchUp (or your software of choice).
Try Your Own Jam Session
I don’t know what kind of access you have to other woodworkers. Maybe it’s a friend at the local woodworking club. Maybe it’s someone in the Wood Whisperer Guild. Maybe it’s me and you’ve hired me for a consultation.
But if you ever get the chance to “jam” on a design together, take it. Share your rough sketch. Share your half-baked idea. Get on a call. Let someone else poke at it. With the right person, it’s exhilarating. Two minds exploring what-ifs. Throwing out ideas. Refining proportions. Building something neither of you would have created alone.
Maybe someday I’ll reach a point where I don’t want outside input. Maybe I’ll be so confident that another opinion would only muddy the water. But I doubt it. Because for me, woodworking isn’t just about building furniture. It’s about making something better than my last project and constantly trying to fill gaps in my woodworking education. Other people with unique perspectives and backgrounds are a great cheat code for achieving that goal.
And that’s music to my ears!
The post Try a Woodworking Jam Session appeared first on The Wood Whisperer.
from The Wood Whisperer https://ift.tt/5rgIaZN
via IFTTT
